Now that you got your Shopify website up and running. Why not add some branding on your checkout page? In this example, we'll add a custom font to our checkout page. This blog assumes you have read my past blogs about Shopify Checkout Extensibility and Shopify in general. I will not write about how to set up a development store and a checkout app. Please read my past blogs on how to do it. I will just go straight into how to configure the custom font for your checkout app.
Default Font
Below is the default font for the checkout page. This is what it looks like before branding our checkout page.
Upload the WOFF File
Upload the custom font (e.g. Playmaker_D.woff) to Shopify Admin > Content > Files. Custom fonts must be in either Web Open Font Format (WOFF) or WOFF2. Once uploaded, we'll need the gid of the WOFF file. There are two ways of grabbing the gid. One is by inspecting it in web tools and it's usually the ID of the TR element. Second is by sending a GraphQL query. We use GraphiQL to run our queries. Make sure the GraphiQL app has the read_checkout_branding_settings and write_checkout_branding_settings access scopes enabled. As you will see below, they both show the same gid.
Next, we'll need the checkout profile ID. This is the target for the custom font changes. Go to Checkout > Customize. The profile ID should appear on the URL address bar after /profiles as can be seen below.
Apply Custom Font
Apply the custom font to primary and secondary surfaces. Primary surfaces include text and buttons. Secondary surfaces include headings. You should see the changes right away. And that is all there is to it. Super simple, isn't it?
How do you secure an already secure web application? Well, the title is that because we are going to build upon Spring's Securing a Web Application guide. You can follow the Spring guide to build your secure web app and then come back here to make it more secure. Or you can just keep on reading, I'm going to share the repo anyway.
Tools
Before we begin, these are the tools I used to make this example:
OpenSSL 3.0.2 15 Mar 2022 (Library: OpenSSL 3.0.2 15 Mar 2022)
Prerequisite
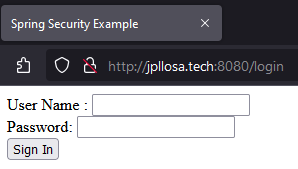
Alright. I'm assuming you followed the Spring guide to securing a web app and got it running. What you did was add Spring Security on your Spring Boot app which then protects your resource endpoints. You have secured it with a login page and only authorized users can access certain resources. You should have something like below.
I have added 127.0.0.1 jpllosa.tech on the Windows hosts (C:\Windows\System32\drivers\etc) file. We can't use localhost for our certificate later.
Requirement
And now the problem we are going to solve. Imagine this secure web app is runnning on our company network. As it stands anyone can see the website on the browser (e.g. by going to http://jpllosa.tech:8080). They would see the welcome and login pages. Now, we don't want just anybody to see the website. We only want, let's say level 1 clearance personnel and machine to see it. What do we do? Any ideas? Yes, we are going to serve the web app over HTTPS (Hypertext Transfer Protocol Secure) and then what's next? Yes, install our own certificate authority as a trusted certificate on the browser of the level 1 personnel's laptop (e.g. an IT services job). Is the requirement clear enough?
Create Self-signed Certificate
We're going to do PEM (Privacy Enhanced Mail) certificates. Thankfully, Spring Boot supports this. We don't have to deal with the Java specific JKS (Java KeyStore) format, which can be tricky to configure sometimes.
Let's start by creating a private key. This is the most important component of our certificate and helps to enable encryption. So open your WSL and generate a private key like so.
$ openssl genrsa -out jpllosa.tech.key 2048
$ ls
jpllosa.tech.key
Second, create a certificate signing request. A certificate signing request (CSR) includes the public key and some additional information like organization and country. We need this because we want our certificate signed. Create the CSR with our private key like below. I've left the challenge password and optional company name blank. The important field is Common Name, which should be the fully qualified domain name (FQDN) of our domain.
$ openssl req -key jpllosa.tech.key -new -out jpllosa.tech.csr
You are about to be asked to enter information that will be incorporated
into your certificate request.
What you are about to enter is what is called a Distinguished Name or a DN.
There are quite a few fields but you can leave some blank
For some fields there will be a default value,
If you enter '.', the field will be left blank.
-----
Country Name (2 letter code) [AU]:AU
State or Province Name (full name) [Some-State]:Some-State
Locality Name (eg, city) []:City
Organization Name (eg, company) [Internet Widgits Pty Ltd]:Internet Widgets
Organizational Unit Name (eg, section) []:section
Common Name (e.g. server FQDN or YOUR name) []:jpllosa.tech
Email Address []:webmaster@jpllosa.tech

Please enter the following 'extra' attributes
to be sent with your certificate request
A challenge password []:
An optional company name []:
$ ls
jpllosa.tech.csr  jpllosa.tech.key
Next, we create a self-signed certificate with our private key and CSR. This is a certificate signed with its own private key. This certificate isn't trusted since it is self-signed. Create a self-signed certificate like so.
$ openssl x509 -signkey jpllosa.tech.key -in jpllosa.tech.csr -req -days 365 -out jpllosa.tech.crt
Certificate request self-signature ok
subject=C = AU, ST = Some-State, L = City, O = Internet Widgets, OU = section, CN = jpllosa.tech, emailAddress = webmaster@jpllosa.tech
$ ls
jpllosa.tech.crt  jpllosa.tech.csr  jpllosa.tech.key
Now we need something for the browser (i.e. client side) as we will need to install a trusted certificate for it. We need a self-signed root certificate authority (CA) certificate. We can do this by being our own certificate authority. Let's create a self-signed root CA like so.
$ openssl req -x509 -sha256 -days 1825 -newkey rsa:2048 -keyout myCA.key -out myCA.crt
.....+...+...+++++++++++++++++++++++++++++++++++++++++++++++++++++++++++++++++*.+....+........+...+...+.+++++++++++++++++++++++++++++++++++++++++++++++++++++++++++++++++*....+..+.............+.................+..........+..+............+.+........+.+..............+....+..+......+.......+..+.............+..+.........+............+....+..............+......+...+...............+...+....+...........+..........+..............+....+...............+..+....+..............+......+.+...+.........+.....+...+.........+....+...........+...+.+.........+..+......+...+....+.....+.+...........+...................+..+...+++++++++++++++++++++++++++++++++++++++++++++++++++++++++++++++++
.................+..........+.....+.......+...+...+..+..........+++++++++++++++++++++++++++++++++++++++++++++++++++++++++++++++++*..+..+.............+..+.+...+..+.......+..+...+.+...........+....+.....+.........+.+.....+.......+..+.......+......+..+.+.....+....+.....+...+.......+..+....+.....+.......+.....+....+........+......+....+.....+...+.......+......+.....+.......+++++++++++++++++++++++++++++++++++++++++++++++++++++++++++++++++*.+...+...+......+...........+.......+...+..+...+.......+..+....+..+.......+........+++++++++++++++++++++++++++++++++++++++++++++++++++++++++++++++++
Enter PEM pass phrase: password
Verifying - Enter PEM pass phrase: password
-----
You are about to be asked to enter information that will be incorporated
into your certificate request.
What you are about to enter is what is called a Distinguished Name or a DN.
There are quite a few fields but you can leave some blank
For some fields there will be a default value,
If you enter '.', the field will be left blank.
-----
Country Name (2 letter code) [AU]:AU
State or Province Name (full name) [Some-State]:Some-State
Locality Name (eg, city) []:City
Organization Name (eg, company) [Internet Widgits Pty Ltd]:Internet Widgets
Organizational Unit Name (eg, section) []:Section
Common Name (e.g. server FQDN or YOUR name) []:my.com
Email Address []:webmaster@my.com
$ ls
jpllosa.tech.crt  jpllosa.tech.csr  jpllosa.tech.key  myCA.crt  myCA.key
Next, we sign our CSR with our root CA. The result will be, the CA-signed certificate will be in the jpllosa.tech.crt file. This is a working certificate. Create like so.
$ openssl x509 -req -CA myCA.crt -CAkey myCA.key -in jpllosa.tech.csr -out jpllosa.tech.crt -days 365 -CAcreateserial
Certificate request self-signature ok
subject=C = AU, ST = Some-State, L = City, O = Internet Widgets, OU = section, CN = jpllosa.tech, emailAddress = webmaster@jpllosa.tech
Enter pass phrase for myCA.key: password
$ ls
jpllosa.tech.crt  jpllosa.tech.csr  jpllosa.tech.key  myCA.crt  myCA.key
Even though we have created a working certificate, it will still be flagged by the browser. What we need is to add the subjectAltName. We need a SAN extension. X.509 certificates need information about the domain for which this particular certificate is issued for. To align with SAN extension stadards, we need to create a configuration text file then add the configuration to the certificate. Like so. How's your vi skills?
$ vi jpllosa.tech.ext
$ cat jpllosa.tech.ext
authorityKeyIdentifier=keyid,issuer
basicConstraints=CA:false
subjectAltName = @alt_names
[alt_names]
DNS.1 = jpllosa.tech
$ openssl x509 -req -CA myCA.crt -CAkey myCA.key -in jpllosa.tech.csr -out jpllosa.tech.crt -days 365 -CAcreateserial -extfile jpllosa.tech.ext
Certificate request self-signature ok
subject=C = AU, ST = Some-State, L = City, O = Internet Widgets, OU = section, CN = jpllosa.tech, emailAddress = webmaster@jpllosa.tech
Enter pass phrase for myCA.key: password
$ ls
jpllosa.tech.crt  jpllosa.tech.csr  jpllosa.tech.ext  jpllosa.tech.key  myCA.crt  myCA.key
Finally, we got a working certificate that meets all the SAN requirements. SAN makes the certificates more secure and it allows the definition of several domains or IP addresses and we can use a single certificate across multiple domains. View the certificate like so. Spot the important bit, Subject Alternative Name.
$ openssl x509 -text -noout -in jpllosa.tech.crt
Certificate:
    Data:
        Version: 3 (0x2)
        Serial Number:
            78:db:cd:5a:18:8d:46:0f:74:55:16:86:dc:f2:74:95:1b:c4:58:0e
        Signature Algorithm: sha256WithRSAEncryption
        Issuer: C = AU, ST = Some-State, L = City, O = Internet Widgets, OU = Section, CN = my.com, emailAddress = webmaster@my.com
        Validity
            Not Before: Oct  5 16:41:02 2024 GMT
            Not After : Oct  5 16:41:02 2025 GMT
        Subject: C = AU, ST = Some-State, L = City, O = Internet Widgets, OU = section, CN = jpllosa.tech, emailAddress = webmaster@jpllosa.tech
        Subject Public Key Info:
            Public Key Algorithm: rsaEncryption
                Public-Key: (2048 bit)
                Modulus:
                    00:ac:70:3c:57:da:fc:f4:b4:f6:4f:f4:3d:64:9f:
                    27:ca:09:d9:b6:4e:4d:89:2f:db:4b:6e:7c:18:4b:
                    af:5c:b4:80:cc:42:0a:cd:1e:15:1e:2d:be:71:e4:
                    6c:59:40:82:c5:ac:29:3b:fa:51:0b:6b:20:11:e5:
                    7d:1e:92:f7:e9:9d:f4:15:31:47:64:ec:1b:a5:14:
                    00:6e:c0:98:76:be:71:9d:c6:97:14:47:aa:30:b1:
                    ef:c4:b4:6b:b0:31:22:25:65:21:ab:35:21:ac:7b:
                    6a:f7:c0:78:d2:90:7d:33:d0:3c:dc:db:21:8e:75:
                    ff:04:83:bd:e6:9a:5d:79:70:a2:59:21:ff:51:20:
                    ea:74:d1:78:89:61:49:f6:6c:87:85:e2:0f:0c:f7:
                    b4:be:2b:79:88:28:fc:f7:50:ef:c1:e6:63:3e:a4:
                    0e:3c:71:18:97:55:5c:76:18:80:67:af:84:0a:16:
                    98:79:aa:00:00:77:a4:1b:97:bd:9c:41:50:13:89:
                    0c:63:29:51:84:7f:95:67:b7:f0:94:2b:b4:bb:50:
                    5e:6f:66:d1:06:4a:97:d6:3a:ac:6e:90:59:22:2c:
                    d3:09:a1:4b:e7:a1:3c:96:f6:b5:9c:25:5f:5b:cb:
                    be:a5:41:11:da:dc:a5:1b:cd:86:4d:a1:bd:44:1c:
                    44:c5
                Exponent: 65537 (0x10001)
        X509v3 extensions:
            X509v3 Authority Key Identifier:
                17:B0:3C:87:D6:06:3C:54:21:F9:0B:8D:94:46:EF:F9:FA:A9:5C:8C
            X509v3 Basic Constraints:
                CA:FALSE
            X509v3 Subject Alternative Name:
                DNS:jpllosa.tech
            X509v3 Subject Key Identifier:
                93:B7:A9:CB:E3:56:A7:38:C1:8A:E6:6E:0A:0B:4B:4C:FE:1A:B7:FA
    Signature Algorithm: sha256With
...snipped...
Configure Spring Boot with PEM Certificates for TLS/SSL Communication
And now the easy part. Thanks to Spring Boot. All we have to do is add some properties on the application.properties file to enable SSL communication. Update the properties file like so.
Place jpllosa.tech.crt and jpllosa.tech.key under /src/main/resources so it can be picked up in the classpath. Try running the web app and go to the site. What do you see? Do you see something like below?
Our HTTPS site is still getting a warning. You could advance and accept the risk but what we want is for the browser to trust the site.
Browser Configuration
We need to import the root CA into the browser so our site can be trusted. These steps are specific to Firefox. Go to Settings > Privacy & Security > View Certificates.
Import myCA.crt and trust it to identify websites. You should be able to see Internet Widgets installed.
Let's try accessing the web app again. What does it say now? The warning is gone and you can go to the welcome and login pages.
Securing a Secure Web Application Summary
What a journey. To secure a Spring Boot app with PEM certificates for SSL communication was the easy bit. Just a few lines in the properties file. The arduous bit was the creation of the PEM certificates. Lastly we had to import our root CA to the browser so our site can be trusted. There you have it. We got to secure a secured web app. Was the requirement satisfied? . As usual, entire code is available at github.com/jpllosa/cert-web-app. Thank you for reading.
This blog builds upon my previous blog, Shopify Check UI Extension Example. Now that we got our Checkout Extensibility app running, it's time to add another payment method. Why do we need to add another payment method? Surely, that's commen sense is the answer to that, right? Having more payment options will let your store cater to more potential customers.
One popular payment method is Paypal. To activate Paypal, on the Shopify admin page, we go the Settings > Payments > Activate Paypal and then follow the instructions. The payment setup would look like below.
Fantastic. Now that we have activated Paypal, we should see something like below on checkout.
Paypal Express Checkout Problem
Well and good that we can accept Paypal payments. But the issue now is that some customers are abandoning the checkout step because they don't have Paypal and it is right at the top of the page. It is making them believe that it is the only payment option. It is confusing the customers especially on mobile view because it's the first thing they see as it is positioned at the top. Our simple requirement now is keep the Paypal payment method and at the same time remove or hide the Paypal express checkout button. Sounds easy enough?
Shopify Function Solution
As mentioned earlier, we are building the Shopify Function extension from my previous blog, Shopify Check UI Extension Example. I'm assuming you have the GitHub repository for it. If not, you can pull from github.com/jpllosa/checkout-practice-app. First off the bat is to generate the extension like so. I've named the extension hide-paypal-express and coding it in JavaScript.
C:\shopify\checkout-practice-app>npm run generate extension

> checkout-practice-app@1.0.0 generate
> shopify app generate extension


To run this command, log in to Shopify.
👉 Press any key to open the login page on your browser
✔ Logged in.
╭─ info ─────────────────────────────────────────────────────────────────────────╮
│                                                                                │
│  Using shopify.app.toml:                                                       │
│                                                                                │
│    • Org:             Joel Patrick Llosa                                       │
│    • App:             checkout-practice-app                                    │
│                                                                                │
│   You can pass `--reset` to your command to reset your app configuration.      │
│                                                                                │
╰────────────────────────────────────────────────────────────────────────────────╯

?  Type of extension?
√  Payment customization - Function

?  Name your extension:
√  hide-paypal-express

?  What would you like to work in?
√  JavaScript


╭─ success ──────────────────────────────────────────────────────────────────────╮
│                                                                                │
│  Your extension was created in extensions/hide-paypal-express.                 │
│                                                                                │
╰────────────────────────────────────────────────────────────────────────────────╯
Update Scopes
Our scopes on the shopify.app.toml should have been updated with the read_payment_customizations and write_payment_customizations. If not, add them like below and do a deploy to push the scopes to the Partner dashboard.
# shopify.app.toml
...snipped...
[access_scopes]
# Learn more at https://shopify.dev/docs/apps/tools/cli/configuration#access_scopes
scopes = "read_payment_customizations,write_payment_customizations"
...snipped...
C:\shopify\checkout-practice-app>npm run deploy

> checkout-practice-app@1.0.0 deploy
> shopify app deploy

╭─ info ─────────────────────────────────────────────────────────────────────────╮
│                                                                                │
│  Using shopify.app.toml:                                                       │
│                                                                                │
│    • Org:             Joel Patrick Llosa                                       │
│    • App:             checkout-practice-app                                    │
│    • Include config:  Yes                                                      │
│                                                                                │
│   You can pass `--reset` to your command to reset your app configuration.      │
│                                                                                │
╰────────────────────────────────────────────────────────────────────────────────╯

?  Release a new version of checkout-practice-app?
√  Yes, release this new version


Releasing a new app version as part of checkout-practice-app

free-shirt-1000     │ Bundling UI extension free-shirt-1000...
hide-paypal-express │ Building function hide-paypal-express...
hide-paypal-express │ Building GraphQL types...
free-shirt-1000     │ free-shirt-1000 successfully built
hide-paypal-express │ Bundling JS function...
hide-paypal-express │ Running javy...
hide-paypal-express │ Done!


╭─ success ──────────────────────────────────────────────────────────────────────╮
│                                                                                │
│  New version released to users.                                                │
│                                                                                │
│  checkout-practice-app-2 [1]                                                   │
│                                                                                │
╰────────────────────────────────────────────────────────────────────────────────╯
[1] https://partners.shopify.com/31716511/apps/1338089799691/versions/3168605962251
Enable the Shopify Function
Next step is to grab the function ID to enable the Shopify function and create the payment customization. For this I've installed GraphiQL app to make executing queries and mutations against my store easier. You can find the function ID the Partners page like below.
Run the paymentCustomizationCreate mutation via the GraphiQL app to enable your Shopify function. Don't forget to replace the function ID. You should have a response like below after that.
mutation {
  paymentCustomizationCreate(paymentCustomization: {
    functionId: "<replace with function ID>"
    title: "checkout practice app"
    enabled: true
  }) {
    paymentCustomization {
      id
    }
    userErrors {
      message
    }
  }
}
Before we hide the Paypal Express Checkout button, let's see how it looks without any logic added to the scaffolding code. Run npm run dev. Go to the checkout page, the top of the page will show the Paypal Express checkout and the bottom will have the standard Paypal payment method. Next, go to your Partners dashboard then your app extensions runs. You should see the logs on what goes in, out and errors. It's empty for now because we haven't added a query and applied any logic to the result of the query.
Under extensions/hide-paypal-express, edit the run.graphql with the query below. This will fetch a list of payment methods available on our checkout.
query RunInput {
  paymentMethods {
    id
    name
  }
}
On the same directory, edit run.js as below. What this code does is fairly simple. Probably does not need any explanation as it is fairly readable and understandable. We just check for a Paypal Express Checkout payment menthod and if it exists apply the hide operation to it by providing the payment method ID and placement. Express checkout is AcceleratedCheckout. Otherwise, return with no changes to the payment methods.
Save your changes and the changes should hot reload. If not, do npm run dev again. Go to the checkout page and the Paypal Express Checkout button should be gone now.
Debugging a Shopify Function
To debug a shopify function, go to your Partners dashboard then your app extensions runs as described above. This time you should see some logs because we have added a query in run.graphql and we have returned an operation. You should have something like below. If you want to dump some values of variables for example, calls to console.error are shown under Logs (STDERR).
There you have it. A handy way to hide the Paypal Express Checkout option in Shopify Checkout. As usual, entire code is available at github.com/jpllosa/checkout-practice-app. Thank you for reading.
As you might have already read on the Shopify website, checkout.liquid is deprecated and stores need to upgrade to Checkout Extensibility by August 13, 2024. So here is an example of how to build a Checkout UI extension.
For this example, our requirement is going to be to provide a free item (e.g. t-shirt) on checkout when the total purchase is greater than a thousand. Clear enough?
Checkout UI Extension Setup
If you have read my past blogs then you probably already have a development store and partner account. In any case, these are the prerequisites:
A Shopify Partner account
A development store that use the Checkout and Customer Accounts Extensibiliy
Shopify CLI
This example was created on a Windows 11 machine with Node v20.11.0, npm v10.2.4 and Shopify CLI v3.60.1. For the final check, on the bottom left of your Shopify Admin page, it should say Checkout and Customer Accounts Extensibility as shown below.
Checkout UI Extension Scaffolding
Super simple, run shopify app init to create you project. You can choose what name you like for your project. In this example, our project name is checkout-practice-app
C:\shopify>shopify app init

Welcome. Let’s get started by naming your app project. You can change it later.

?  Your project name?
√  checkout-practice-app

?  Get started building your app:
√  Start by adding your first extension

╭─ info ─────────────────────────────────────────────────────────────────────────╮
│                                                                                │
│  Initializing project with `npm`                                               │
│  Use the `--package-manager` flag to select a different package manager.       │
│                                                                                │
╰────────────────────────────────────────────────────────────────────────────────╯


╭─ success ──────────────────────────────────────────────────────────────────────╮
│                                                                                │
│  checkout-practice-app is ready for you to build!                              │
│                                                                                │
│  Next steps                                                                    │
│    • Run `cd checkout-practice-app`                                            │
│    • For extensions, run `shopify app generate extension`                      │
│    • To see your app, run `shopify app dev`                                    │
│                                                                                │
│  Reference                                                                     │
│    • Shopify docs [1]                                                          │
│    • For an overview of commands, run `shopify app --help`                     │
│                                                                                │
╰────────────────────────────────────────────────────────────────────────────────╯
[1] https://shopify.dev
Checkout UI Extension App
Next step is to create the checkout UI extension. This is the code that will modify the checkout page. Change to you project directory and run npm run generate extension. You can choose what technology stack you'ld like to work in. I have chosen JavaScript React for this example.
C:\shopify\checkout-practice-app>npm run generate extension

> checkout-practice-app@1.0.0 generate
> shopify app generate extension


Before proceeding, your project needs to be associated with an app.

?  Create this project as a new app on Shopify?
√  Yes, create it as a new app

?  App name:
√  checkout-practice-app

╭─ info ─────────────────────────────────────────────────────────────────────────╮
│                                                                                │
│  Using shopify.app.toml:                                                       │
│                                                                                │
│    • Org:             Joel Patrick Llosa                                       │
│    • App:             checkout-practice-app                                    │
│                                                                                │
│   You can pass `--reset` to your command to reset your app configuration.      │
│                                                                                │
╰────────────────────────────────────────────────────────────────────────────────╯

?  Type of extension?
√  Checkout UI

?  Name your extension:
√  free-shirt-1000

?  What would you like to work in?
√  JavaScript React


╭─ success ──────────────────────────────────────────────────────────────────────╮
│                                                                                │
│  Your extension was created in extensions/free-shirt-1000.                     │
│                                                                                │
│  Next steps                                                                    │
│    • To preview this extension along with the rest of the project, run `npm    │
│      run shopify app dev`                                                      │
│                                                                                │
│  Reference                                                                     │
│    • For more details, see the docs [1]                                        │
│                                                                                │
╰────────────────────────────────────────────────────────────────────────────────╯
[1] https://shopify.dev/api/checkout-extensions/checkout/configuration
Take a look at your Shopify Partners portal page and your app should be there.
What does this piece of code do? This UI extension targets purchase.checkout.cart-line-list.render-after. Which means this UI will be inserted at that target location. It will be rendered after all line items.
Moving along, we use 3 APIs provided by Shopify. The useTranslate hook returns the I18nTranslate interface used to translate strings. We can do something like <Text>{translate('welcome')}</Text> which pulls the welcome message in en.default.json and renders it in a Text component. But we won't be using it in this example.
The useSettings hook returns the settings values defined by the merchant for the extension. These settings values are found in shopify.extension.toml. The value of the key freebie_title is then assigned to freeItem. We can set the value in the customize mode of the checkout page which is driven by the below extension settings.
shopify.extension.toml
...snipped...

[extensions.settings]
  [[extensions.settings.fields]]
    key = "freebie_title"
    type = "single_line_text_field"
    name = "Freebie title"
    description = "Free item name"
The useSubtotalAmount API returns a Money value representing the subtotal value of the items in the cart at the current step of checkout. Obviously we'll need the amount to check if it is more than a thousand so we can render the free item. So if there is a free item set and the subtotal is more than a thousand we render the free item using Shopify provided React components. This ends the coding part.
Running and Customizing the App
Time to run the app. Execute npm run dev and follow the instructions (e.g. "P" to preview in your browser).
C:\shopify\checkout-practice-app>npm run dev

> checkout-practice-app@1.0.0 dev
> shopify app dev

?  Which store would you like to use to view your project?
√  checkout-practice

╭─ info ─────────────────────────────────────────────────────────────────────────╮
│                                                                                │
│  Using shopify.app.toml:                                                       │
│                                                                                │
│    • Org:             Joel Patrick Llosa                                       │
│    • App:             checkout-practice-app                                    │
│    • Dev store:       checkout-practice.myshopify.com                          │
│    • Update URLs:     Not yet configured                                       │
│                                                                                │
│   You can pass `--reset` to your command to reset your app configuration.      │
│                                                                                │
╰────────────────────────────────────────────────────────────────────────────────╯

✔ Created extension free-shirt-1000.
07:43:25 │ graphiql   │ GraphiQL server started on port 3457
07:43:25 │ extensions │ Bundling UI extension free-shirt-1000...
07:43:25 │ extensions │ Parsed locales for extension free-shirt-1000 at
C:/shopify/checkout-practice-app/extensions/free-shirt-1000
07:43:25 │ extensions │ free-shirt-1000 successfully built
07:43:25 │ extensions │ Parsed locales for extension free-shirt-1000 at
C:/shopify/checkout-practice-app/extensions/free-shirt-1000
07:43:27 │ extensions │ Draft updated successfully for extension: free-shirt-1000

────────────────────────────────────────────────────────────────────────────────────────────────────────────────────────────
› Press d │ toggle development store preview: ✔ on
› Press g │ open GraphiQL (Admin API) in your browser
› Press p │ preview in your browser
› Press q │ quit

Preview URL: https://damaged-breakfast-campus-syria.trycloudflare.com/extensions/dev-console
GraphiQL URL: http://localhost:3457/graphiql
Before we can see our app in action, we need to do some bits and bobs. Go to Settings > Checkout > Customize to add the app block.
Add app block. Can you see the free-shirt-1000 extension?
App block added. Can you see it below the line items?
App block settings. Does it remind you of the extension settings in shopify.extension.toml? We're giving away an Acme Brand T-shirt for purchases over a thousand.
Now, go purchase something over a thousand and go to checkout. You should have something like below.
Try buying something that's belowe a thousand and go to checkout. You are not getting a free item.
Shopify Checkout UI Extension Summary
There you have it. Your first Shopify Checkout UI Extension. To recap, create the scaffolding using Shopify CLI. After that is in place generate an extension. Choose a target location in the checkout page and add your custom logic. Last bit is doing some bit of config to render your UI extension. Good luck creating your own Shopify Checkout UI Extension in the future. Grab the repo here, github.com/jpllosa/checkout-practice-app.
Why do we want our web server to redirect web requests to a new URL? Several reasons really. Here are some of the reasons:
We want HTTP requests redirected to the HTTPS version of our website.
Redirect www requests to our non-www website.
Perhaps the reason that holds a lot of weight is for SEO purposes. If a search engine crawler encounters a broken link then that URL will not be indexed. So if you have a webpage that is high up in Page Rank value, obviously you'ld want to keep that high Page Rank value, you don't want the web crawler encountering a broken link. The crawler not only notes the new URL but also processes the transferring of the Page Rank value from the old URL to the new one. The already achieved SEO rank is preserved.
A short and easy to remember URL can redirect to long and complex one, vice versa.
We want to redirect similarly named domain name into our main website (e.g. example.net redirects to example.com, common misspellings are redirected to the main site, etc.)
Apache Redirect Setup
This example was done on a Windows 11 machine with Windows Subsystem for Linux running Ubuntu 22.04. Our web server is Apache v2.4. I will not be demonstrating how to install WSL and Ubuntu. I'm going to assume that you already have something similar set up. It is also assumed that the reader knows how to navigate Linux (e.g. vi, nano, sudo, etc.). This blog will demonstrate how to configure Apache2 to perform redirects. You should have something like below already.
Plain and Simple URL Redirect
This plain and simple URL redirect approach is good if you only need to redirect a few URLs. We can easily add it on the Apache2 configuration file. But first, let's see it break like below. If it is a fresh Apache2 install, then your /var/www/html directory shouldn't have a broken directory in it. Let's go to http://localhost/broken.
Let's add a redirect in the Apache configuration file (i.e. /etc/apache2/sites-available/000-default.conf). Below is the syntax and the line to add inside the VirtualHost block.
Restart Apache, sudo service apache2 restart. Open your browser and disable cache in your network tab before hitting http://localhost/broken. You should have something like below.
As you can clearly see in the Network logs, Apache told our browser to "301" to the root resource. Take note of the Transfered column and hit http://localhost/broken again. You should have something like below.
Did you see the difference? Take a look at the Transferred column. It is pulling cached data. Alright, let's change 301 to 302 in the Apache configuration file and restart. On the first call tick disable cache and hit the /broken resource again. What do you see on the Network logs?
Ok, now the Status is 302. Again, take note of the Transferred column. Untick disable cached and hit the /broken URL again. What do you see now?
Interesting, the 302 row downloaded data from the web server. It didn't pull from the browser cache. Why? How? What the? The HTTP 301 status code means the resource has moved permanently. Since the browser already know that it is going to be the same resource, it just pulled from the cache. The HTTP 302 status code means the resource has moved temporarily. Since it is temporary, the browser downloads the data again because the original URL could be available again. This is also why a 301 is more desirable from a SEO perspective. Since it is a permanent redirect, the search engine crawler will initiate the transfer of Page Rank value to the new URL. Thus preserving the SEO ranking.
Complex Apache Redirect
For production systems, the Apache module mod_rewrite is the best choice. It is fast, powerful and has the ability to manipulate URLs in a simple way. The rules are defined in a .htaccess file. The following command enables mod_rewrite on Ubuntu, sudo a2enmod rewrite. Then restart Apache to take effect. You'll know what modules are enabled by looking at the /etc/apache2/mods-enabled directory. Likewise, /etc/apache2/mods-available tells you what modules are available.
Next step is to allow the use of .htaccess files. Replace the Redirect 301 /broken / directive in /etc/apache2/sites-available/000-default.conf with the below and restart Apache.
And then create the .htaccess file in /var/www/html with the below contents. You don't need to restart Apache for the changes on this file to take effect.
RewriteEngine on
RewriteRule ^broken$ http://localhost [R=301]
The above will redirect requests to http://localhost/broken back to http://localhost. You should have the same result as the Simple 301 Redirect demonstrated earlier. The first line enables the mod_rewrite. The second line is the regular expression to match and replace the URL. The syntax is RewriteRule [pattern] [substitution] [flags]. The pattern is a regular expression to match. It is then substituted with a full file system path or a web path relative to the root directory or an absolute URL. The flags are optional. In this example, it forces a 301 redirect.
Usually, a RewriteRule is introduced by a RewriteCond. This specifies the conditions under which the RewriteRule takes effect. The syntax is RewriteCond [test string] [condition] [flags]. The test string is typically a server variable with the format %{VARIABLE NAME}. The condition could be a regular expression or a string comparison or file/path tests. Flags are optional (e.g. NC - which means ignore case).
Apache Redirect Example Summary
There you have it. A simple and complex way of redirect traffic to your website. You can know rest easy that your Page Rank value is preserved with some magical Apache redirect configurations. Happy redirecting.
In this example, I'll demonstrate one way of migrating a repository from GitLab to GitHub. Sounds simple enough? Kinda? Here are the requirements and a caveat.
Preserve as much history as possible (e.g. tags, branches, commits, merges, etc.).
The GitLab repo is on premise and is only accessible through the organization VPN.
Now this would have been easy if your GitLab repo can be seen by GitHub. Sadly it can't because your repo is behind a firewall. What do we do now? Well the good thing is both are git repositories. I did these steps on a Windows 11 machine with git for Windows v2.44.
Create a new repo on GitHub. Make sure to name it the same as the one on GitLab.
On git bash, make a "bare" clone of the GL (GitLab) repo in your local machine. This creates a full copy of the data, but without a working directory for editing files, and ensures a clean, fresh export of all the old data.
Push the locally cloned repository to GH (GitHub) using the "mirror" option. This ensures that all references, such as branches and tags, are copied to the imported repository.
As you can see from above, it looks like everything got copied over. Branches, tags and all that jazz. A thing to note though, if you got various git accounts from different git servers then you might need to change some configuration before you can push. See git config command for more details.
All done. You can now remove the temporary local repo and then use the GH repo from now on.
    cd ..
    rm -rf REPO.git
GitLab to GitHub Migration
Were the branches preserve? As can bee seen below, it has been.
Were the tags preserve? As can bee seen below, it has been.
Were the commits preserve? As can bee seen below, it has been.
Awesome! That was a successful migration. Great job!
Some Reminders
On GH don't forget to configure the default branch settings, add collaborators and teams, etc.
If your repo is a Maven project, don't forget to update the scm details.
Don't forget to update your CI/CD pipelines. For example update your Jenkins job to pull from the new GH repo.
GitLab to GitHub Migration Closing
Now you know how to migrate your git repo from GL to GH. Everything got preserved as well even when your GL server was behind a firewall.
If you are working on a Shopify project, chances are you'll have multiple stores. One for development, one for pre-production and one for production or live which is accessible to the public. Because of this, you'ld probably want these stores to have the same products. Although there is an option to import/export products in Shopify admin, it does not copy over the metafields. And you're in deep equine effluence if rely heavily on metafields.
In this example, we are going to learn how to copy a product to another store using Shopify GraphQL. This example builds upon my previous blog, Shopify Bulk Query Example. I would recommend you read the previous blog if you want to know more about the cached products. I will only talk about how to copy a product to another store in this article. Okay, let's get to it.
Target Store
As mentioned above, we are building upon the previous example, Shopify Bulk Query Example. So we already have a Quickstart store in place. Let's create a target development store. On the Shopify partners page go to Stores -> Add store -> Create development store. Choose "Create a store to test and build", fill in the form as appropriate. Example Copy Product store:
After the target store has been created, it shouldn't have any products like below.
Custom App on Target Store
On the target store, go to Settings -> Apps and sales channels -> Develop apps. Allow custom app development and Create an app. Let's name it Product API. On the Configuration tab you must have the access scopes write_products and read_products. As of this writing, the webhook version is 2024-01. Install the app. On the API credentials tab, take note of your Admin API access token (you'll need to add this in the request header). Keep your access tokens secure. Only share them with developers that you trust to safely access your data. Take note of your API key and secret key as well. Our Copy Product store is now configured and ready to create products. For detailed steps on how to create a custom app, please take a look at my previous blog, Consuming Shopify Product API Example.
Config Changes
First off, we'll need to add the target store to our config file and update our code. Should be self explanatory based on the names. We have a source store and a target store. We copy the product from the source store (i.e. endpoint) over to the target store (i.e. targetEndpoint)
In this part of the code, we pull the gid of the product that we are going to copy from the query parameter. We then find it if that product exists in the product cache. We call the CopyProduct function which returns an error if the copy was unsuccessful and then we send back a Copy product failed message to the caller in JSON format. For a successful copy, the source product information is returned.
Nothing fancy. Just an update on the data model based on Shopify documentation. For more information, go to Shopify Docs.
bulk-query.go
// snipped...

type ProductCreate struct {
	Product Product `json:"product,omitempty"`
}

type Data struct {
	BulkOperationRunQuery BulkOperationRunQuery `json:"bulkOperationRunQuery,omitempty"`
	CurrentBulkOperation  BulkOperation         `json:"currentBulkOperation,omitempty"`
	ProductCreate         ProductCreate         `json:"productCreate,omitempty"`
}

// snipped...
This is where all the grunt work happens. The first lines of the copy product function will create the metafields portion of the GraphQL query. The metafields portion is then inserted to the productCreate GraphQL mutation query. For this example, we are going to assume all metafields are of type single_line_text_field. Because of this, the caveat is, this will not work if the metafield of the product you are going to copy is of a different type. The request is then sent to the target endpoint with the target accss token in the header. If all goes well, it will print the gid of the newly created product. Otherwise the error is passed to the caller to handle.
I'm assuming you have read my previous blogs, Consuming Shopify Product API Example and Shopify Bulk Query Example. So you should be able to run the golang app and hit the endpoints with Postman. First, let's fetch the cached products and I've chosen gid://shopify/Product/8787070452004 as my source product like so.
Second, let's hit the copy product endpoint and provide the gid query parameter. A successful copy returns the source product information like so.
On the logs, we should see something like below.
Found: gid://shopify/Product/8787070452004
++ copy product
Response status: 200 OK
New product copied:  gid://shopify/Product/8343228219651
2024/03/16 22:35:45 "GET http://localhost:4000/copy-product?gid=gid://shopify/Product/8787070452004 HTTP/1.1" from [::1]:51397 - 200 283B in 22.7344888s
Before we can see the metafields on the Shopify admin product page, we need some bit of configuration for the metafields to show on the product page. Go to Settings -> Custom Data -> Products -> Metafields without a definition. Our namespace and key have been created. Add the definition (i.e. name, description and type). After saving, it will appear in the product page.
Finally, we can see our copied product along with the tags and metafields in all its glory.
Copy Shopify Product Wrap Up
There you have it. A way to copy a product from store to store in Shopify using Shopify GraphQL Admin API. This should form as a base for copying products between stores. Grab the full repo here, github.com/jpllosa/shopify-product-api/tree/copy-product.