Alright, now that you got a docker image in the previous example, Dockerize Spring Boot App Example, what now? The most obvious next step is to spin up the docker image in a Kubernetes cluster. But GKE (Google Kubernetes Engine) is bloody expensive for us mere mortals. Luckily we can practice Kubernetes stuff with Docker Desktop.
First up is to start a Kubernetes cluster via Docker Desktop. Should just be a bunch of clicks. I just chose a single node cluster (Kubeadm). You should have something like below:
And if you have Lens K8S IDE. You'll have something like below.
Deploy to Kubernetes
First, let's check our image (docker images). Like so:
C:\workspace>docker images
                                                                                                    i Info →   U  In Use
IMAGE                                                                   ID             DISK USAGE   CONTENT SIZE   EXTRA
crowsnest:v1.0.0                                                        b9bfb190828e        567MB          197MB    U
Let's make sure we deploy to docker desktop kubernetes.
C:\workspace>kubectl config use-context docker-desktop
Switched to context "docker-desktop".
And the fun starts, create a deployment.
C:\workspace>kubectl create deployment crowsnest --image=crowsnest:v1.0.0
deployment.apps/crowsnest created
After deployment, take a look at Lens and Docker Desktop.
Or if you like CLI.
C:\workspace>kubectl get pods
NAME                        READY   STATUS    RESTARTS   AGE
crowsnest-f56bb85ff-t9dn9   1/1     Running   0          28m
Well and good so far. But our web app is not reachable from the browser yet. We need to expose the port of the pod so we can get to the web app. Do note that your pod name might be different from this example.
C:\workspace>kubectl expose pod crowsnest-f56bb85ff-t9dn9 --port=8080 --name=crowsnest --type=LoadBalancer
service/crowsnest exposed

C:\workspace>kubectl get services
NAME         TYPE           CLUSTER-IP     EXTERNAL-IP   PORT(S)          AGE
crowsnest    LoadBalancer   10.100.27.69   localhost     8080:31912/TCP   97s
kubernetes   ClusterIP      10.96.0.1              443/TCP          4d3h
You should have something like below.
Perfecto! We should be able to access Crowsnest on the browser now. localhost:8080.
Thank you Docker Desktop for helping us save money by practicing kubectl stuff with you, instead of the expensive GKE. Deploying to GKE should be similar. Just need to point kubectl to GKE.
Undeploy from Kubernetes
Most importantly when doing this on a paid Kubernestes service, don't forget to delete the pod, service, deployment, etc. GKE billing is astronomical (delete the project too to be sure!) Here are the commands to undo what you've done.
C:\workspace>kubectl delete service crowsnest --now
service "crowsnest" deleted from default namespace

C:\workspace>kubectl delete deployment crowsnest --now
deployment.apps "crowsnest" deleted from default namespace

C:\workspace>kubectl get services
NAME         TYPE        CLUSTER-IP   EXTERNAL-IP   PORT(S)   AGE
kubernetes   ClusterIP   10.96.0.1            443/TCP   4d3h

C:\workspace>kubectl get pods
No resources found in default namespace.
Deploy to Kubernetes Wrap Up
Yes, we did all of the above steps manually. Yes, this can all be automated. But before we automate stuff, we have to do it manually. For example, you can create a GitHub action workflow to do all of the above steps to spin up your docker image to GKE, just with a yaml file. That would be another story. Happy spinning!
One of the benefits of a dockerize app (dockerize is synonymous with containerization, just like googling is to web searching) is the ease of deployment to different environments. Once you got that docker image built, you can stick it in any environment you like. Shall we dockerize your Spring Boot app? Here's a quick example.
Before we can run the docker file, let's build the project first. Run, mvn clean install in IntelliJ or via command line. That should create a target directory. Now, let's take a look at the Dockerfile found at the root directory.
FROM eclipse-temurin:17-jdk-alpine
RUN addgroup -S crowsnest && adduser -S crowsnest -G crowsnest
USER crowsnest:crowsnest
COPY docker-files/ app-files
ARG JAR_FILE=target/*.jar
COPY ${JAR_FILE} crowsnest.jar
ENTRYPOINT ["java", "-jar", "crowsnest.jar", "--spring.config.location=/app-files/application.properties"]
What does above file mean? What will it do? FROM means that this is the base image. Our crowsnest image will extend from this image. Docker Hub contains a lot of Docker images that are suitable as base images. In this case our base image is built by Eclipse Temurin loaded with OpenJDK 17.
The RUN command will execute the Alpine Linux shell commands addgroup and adduser. The end result is a user called crowsnest belonging to the crowsnest group. This user will run the Crowsnest Spring Boot app. We don't want root running the app. The -S is a flag for system services or daemon group.
The USER command will set the user name and user group to crowsnest as the default user and group. This user is used for succeeding RUN, ENTRYPOINT, and CMD commands.
The COPY command, as it says, will copy the files in our local docker-files directory to the app-files directroy in the Alpine Linux image.
The ARG command defines the JAR_FILE variable that is passed at build time to the builder.
The next COPY command, copies all the jar files from the target directory into a single jar called crowsnest.jar.
Lastly ENTRYPOINT command configures the container to run as an executable. In this case, it will run java with the -jar and --spring.config.location parameters.
Right, let's build the image using the docker build command. Like so:
C:\workspace\crowsnest>docker build -t crowsnest:v1.0.0 .
[+] Building 5.2s (8/8) FINISHED docker:desktop-linux
=> [internal] load build definition from Dockerfile
The above command builds the crowsnest image with the image identifier (i.e tag) crowsnest:v1.0.0 on the current path. I sometimes add the option --no-cache to not use cache when building the image. After a successful build, you should have something like below. Old school way is docker images on the CLI (Command Line Interface.
Running the Docker Image
Righto, let's see this image in action. Go to the command line and run docker run -p 8080:8080 crowsnest:v1.0.0. This command will create and run a new container from the image tagged crowsnest:v1.0.0 exposing port 8080 and routing incoming requests to Crowsnest running on port 8080. In the words, the first 8080 is the container port number. The second is your app's port number. You should have something like below.
C:\workspace\crowsnest>docker run -p 8080:8080 crowsnest:v1.0.0

  .   ____          _            __ _ _
 /\\ / ___'_ __ _ _(_)_ __  __ _ \ \ \ \
( ( )\___ | '_ | '_| | '_ \/ _` | \ \ \ \
 \\/  ___)| |_)| | | | | || (_| |  ) ) ) )
  '  |____| .__|_| |_|_| |_\__, | / / / /
 =========|_|==============|___/=/_/_/_/

 :: Spring Boot ::                (v3.5.9)

2026-02-18T15:26:52.406Z  INFO 1 --- [crowsnest] [           main] n.c.crowsnest.CrowsnestApplication       : Starting CrowsnestApplication v0.0.1-SNAPSHOT using Java 17.0.17 with PID 1 (/crowsnest.jar started by crowsnest in /)
2026-02-18T15:26:52.409Z  INFO 1 --- [crowsnest] [           main] n.c.crowsnest.CrowsnestApplication       : No active profile set, falling back to 1 default profile: "default"
2026-02-18T15:26:53.293Z  INFO 1 --- [crowsnest] [           main] o.s.b.w.embedded.tomcat.TomcatWebServer  : Tomcat initialized with port 8080 (http)
2026-02-18T15:26:53.307Z  INFO 1 --- [crowsnest] [           main] o.apache.catalina.core.StandardService   : Starting service [Tomcat]
2026-02-18T15:26:53.307Z  INFO 1 --- [crowsnest] [           main] o.apache.catalina.core.StandardEngine    : Starting Servlet engine: [Apache Tomcat/10.1.50]
2026-02-18T15:26:53.343Z  INFO 1 --- [crowsnest] [           main] o.a.c.c.C.[Tomcat].[localhost].[/]       : Initializing Spring embedded WebApplicationContext
2026-02-18T15:26:53.344Z  INFO 1 --- [crowsnest] [           main] w.s.c.ServletWebServerApplicationContext : Root WebApplicationContext: initialization completed in 878 ms
2026-02-18T15:26:53.796Z  INFO 1 --- [crowsnest] [           main] o.s.b.a.w.s.WelcomePageHandlerMapping    : Adding welcome page: class path resource [static/index.html]
2026-02-18T15:26:53.974Z  INFO 1 --- [crowsnest] [           main] o.s.m.s.b.SimpleBrokerMessageHandler     : Starting...
If you are not old school, the docker desktop UI will look like so:
You can start/stop the image from running via the Actions button. Chances are you might experience some connectivity problems. Can't connect to an API or database. Click on the three dots then "Open in terminal". This should give you a shell prompt like below. As you can see, we are running Alpine Linux. Remember FROM eclipse-temurin:17-jdk-alpine? On the root directory is app-files and crowsnest.jar. Built with the following commands COPY docker-files/ app-files and COPY ${JAR_FILE} crowsnest.jar. Here, you can try ping, curl, wget, telnet, etc. to check connectivity. Excellent!
Dockerize a Spring Boot App
Outstanding. We have built and ran a docker image. We can spin this image up in any environment we like. To recap, we build our image from a base image then add what we need like the necessary configuration files, the application itself, etc. Finally, we specify our app as the default executable. Happy dockerizing!
Want to send notifications to your WebSocket clients? What if you want to send messages to connected clients so they can update their UI? You definitely can send messages from the back-end (e.g. from any part of your application). Any application component can send messages to the message broker. The easiest way to do so is to inject a SimpMessagingTemplate and use it to send messages. Typically, you would inject it by type. If another bean of the same type exists, qualify it by name (@Qualifier).
My example is taken from my simple monitoring app, Crowsnest (Crowsnest repository in GitHub). Here's the code where I use SimpMessagingTemplate. This web app just checks whether sites are online or offline.
package net.codesamples.crowsnest;

... imports snipped ...

@Component
public class ScheduledPings {
    private static final Logger log = LoggerFactory.getLogger(ScheduledPings.class);

    private static final SimpleDateFormat dateFormat = new SimpleDateFormat("HH:mm:ss");

    @Autowired
    EnvironmentConfigurationWatcher environmentConfigurationWatcher;

    @Autowired
    SimpMessagingTemplate simpMessagingTemplate;

    private WebClient webClient = WebClient.create();

    private List internalEnvironmentList = new ArrayList<>();

    private ObjectMapper mapper = new ObjectMapper();

    @Scheduled(cron = "${cron.expression}")
    public void pinger() {
        log.info("The time is now {}", dateFormat.format(new Date()));
        List environmentList = environmentConfigurationWatcher.getEnvironmentList();
        log.info("Environment list: {}", environmentList);

        for (Environment environment : environmentList) {
            for (App app : environment.getApps()) {
                Mono mono = webClient.get()
                        .uri(app.getUrl())
                        .exchangeToMono(clientResponse -> {
                            HttpStatusCode statusCode = clientResponse.statusCode();
                            if (statusCode.is2xxSuccessful()) {
                                app.setStatus("up");
                            }
                            log.info("StatusCode: {} = {}", statusCode, app.getUrl());
                            return clientResponse.bodyToMono(String.class);
                        })
                        .onErrorResume(Exception.class, exception -> {
                            log.info("Exception {}", exception.getMessage());
                            app.setStatus("down");
                            return Mono.empty();
                        });
                mono.subscribe();
            }
        }

        if (internalEnvironmentList.isEmpty()) {
            internalEnvironmentList = deepCopy(environmentList);
            simpMessagingTemplate.convertAndSend("/topic/environments", internalEnvironmentList);
        } else {
            if (!areTheSame(environmentList, internalEnvironmentList)) {
                log.info("environmentList NOT equal to internalEnvironmentList: \n {} \n {}",
                        environmentList, internalEnvironmentList);
                internalEnvironmentList = deepCopy(environmentList);
                simpMessagingTemplate.convertAndSend("/topic/environments", internalEnvironmentList);
            } else {
                log.info("environmentList equal to internalEnvironmentList");
            }
        }
    }

    private List deepCopy(List src) {
	    ... snipped ...
    }

    private boolean areTheSame(List list1, List list2) {
        ... snipped ...
    }
}
Straight to the point and no lollygagging, on lines 15, 52, and 58 are where the magic happens. So we let Spring inject the SimpMessagingTemplate, then send the message to the target destination. In this example, the destination is "/topic/environments". This is mapped to a method in a controller class. And that is how you update your connected clients via WebSocket.
In this example, on initial load where the environment list is still empty, we update all connected clients. The clients are updated as well when there is a change in the environment list. Here easily validated by checking if the old list matches the new list.
For setting up WebSocket on your Spring Boot app, front-end and back-end basics, I'll point you to my previous blog, Spring Boot WebSocket Example
Demonstration
I'm using IntelliJ IDEA 2023.3.4 (Community Edition). You can use any IDE you like. You can even go command line! Start up the Crowsnest web app. Once it has started, it should be accessible on http://localhost:8080 and you should have something like below when connected. Go ahead, click the connect button. Pay attention to the web console logs. Notice the JSON environments list.
Now, let's edit the environments.json file to force the back-end to notify the clients. For this, I'm just going to add "New" to the title. From "Development" to "New Development". On the back-end logs. The old environment list will not be equal to the new environment list which will trigger a publish message to the topic. You should see something like this on the logs.
Alright, we got a new title. Let's head back to the browser. It should now render the new title and you'll also see it log the new environment list. Like so.
Spring SimpMessagingTemplate
Now you don't need to poll the back-end incessantly. All you have to do is connect via WebSocket and wait for any notification. That should relieve the front-end of keeping up to date. Thank you for reading and happy WebSocket-ing.
What do you hate the most about pull requests? Is it the formatting changes that clearly add no value and just makes the diff confusing? Or a PR that breaks the build? Don't you just hate a PR that breaks the build? In this example we will automate the code review by checking for a broken build when a pull request is opened. How is this done? By the power of GitHub actions.
GitHub Actions
We'll utilize my old GitHub project, github.com/jpllosa/tdd-junit from Test-Driven Development with Spring Boot Starter Test. Clicking on the Actions tab, GitHub will offer GitHub actions if you haven't created any. If you already have an Action then hit the New workflow button. For our example repo, we should see somthing like below:
GitHub Actions Java with Maven
Clicking Configure will create a template maven.yml file in .github/workflows folder as shown below. Editing a yml file in GitHub is also a nice way to search for actions. Commit then pull to have a local copy. Let's create a development branch and a feature branch (github-action-java-maven). What we would like to happen is when a pull request into development, it would automatically trigger a build, test and create a review comment if it's a broken build.
Finding GitHub Actions
$ git pull
From https://github.com/jpllosa/tdd-junit
 * [new branch]      development -> origin/development
 * [new branch]      github-action-java-maven -> origin/github-action-java-maven
Already up to date.

$ git checkout github-action-java-maven
maven.yml
Let's edit the maven.yml template. If you're using Spring Tool Suite and can't find your file, you might have to untick *. resources. Then you should be able to see the yml file.
Spring Tool Suite Filter
Spring Tool Suite Java Element Filter
GitHub Workflow YML file
Your yml file should look like below:
name: Java CI with Maven

on:
  pull_request:
    branches:
      - 'development'

jobs:
  build:

    runs-on: ubuntu-latest

    steps:
      - name: Checkout
        uses: actions/checkout@v3.6.0
      - name: Set up JDK
        uses: actions/setup-java@v3.12.0
        with:
          java-version: '8'
          distribution: 'semeru'
          cache: maven
      - name: Build with Maven
        run: mvn -B clean package
      - name: View context attributes
        if: ${{ failure() }}
        uses: actions/github-script@v6.4.1
        with:
          script: |
            console.log(context);
          github-token: ${{ secrets.GITHUB_TOKEN }}
          debug: true
      - name: Create PR Comment
        if: ${{ failure() }}
        uses: actions/github-script@v6.4.1
        with:
          script: |
            github.rest.pulls.createReview({
              owner: context.repo.owner,
              repo: context.repo.repo,
              pull_number: context.payload.pull_request.number,
              event: "COMMENT",
              body: "It is a mortal sin to PR a broken build! :rage:",
              comments: [],
            })
          github-token: ${{ secrets.GITHUB_TOKEN }}
          debug: true
I won't be explaining workflows in too much detail. I'll let the GitHub Docs do that for me. I will however explain this YAML file. Let's start from the top. Our workflow name is Java CI with Maven. This workflow is triggered when a pull request is opened on branch development. Our workflow run is made up of a single job, with a job ID of build. The type of machine that will process our job is the latest version of Ubuntu.
Steps, the place where all the grunt work is done. First is the Checkout. It uses the Checkout GitHub action to checkout our repository. Second it Set up JDK. It uses the Setup Java JDK GitHub action to download and set up Java version 8. Third is Build with Maven which runs the mvn -B clean package command. Fourth is the View context attributes. It uses the GitHub Script GitHub action to help us write scripts in our workflow that uses the GitHub API and the workflow run context. This step is ran when any of the previous steps has failed. The failure() is a status check function. This step is for debugging purposes only, hence the log to the console call. Fifth is the Create PR Comment action. It uses the same GitHub action as the previous one. If the Build with Maven step fails then this will create a review comment saying that it is a mortal sin to create a pull request with a broken build. LOL!
GitHub Actions in Action
Let's add a unit that fails in MathFunTest.java, push it then create a PR. Our source branch is github-action-java-maven and the target development so that the workflow gets triggered.
package com.blogspot.jpllosa;

// snipped...

@SpringBootTest
public class MathFunTest {
	// snipped...

	@Test
	public void testThatFails() {
		fail("Not yet implemented");
	}
}
What's the outcome? You should see something like below when creating a pull request with a broken build:
Pull Request Review Comment
Remove the failing test then push the code and you should have something like below:
GitHub Actions Success
GitHub Actions Java with Maven Summary
GitHub Actions did all the work for us. From setting up the machine with all the required Java tools. Checking out the repo and then building and running the tests. And finally creating the review comment via the GitHub Script Github action API. There you have it. An automated code review comment for those PRs breaking the build. Hope you had fun reading and applying a similar GitHub action. I know I did.
In this article we will demonstrate a React Front-End app served through Spring Boot's embedded Tomcat. Why do it this way? We can serve a React app in different ways (e.g. Apache Web Server, Nginx, etc.). What is so special about serving a React app through Spring Boot's Tomcat? There is nothing special. A reason could be that the development team is already well versed in Spring Boot with Tomcat. They have mastered configuring Tomcat and investing in a new web server (e.g. Nginx) is of little value. Another could be the deployment pipeline is already set up to do Java/Maven deployment (e.g. Jenkins). Lastly, it could be that you are a new hire and the development team already do it that way. That is, we don't have a choice but to support an existing React FE app served through Spring Boot.
Our focus will be on building the React app so that it can be deployed through a Spring Boot fat jar. We will lightly touch on starting a Spring Boot and React apps. It is assumed that the reader has knowledge regarding Node, React, Java, Maven, Spring Boot, etc. The reader should know how to set up the mentioned technology stack.
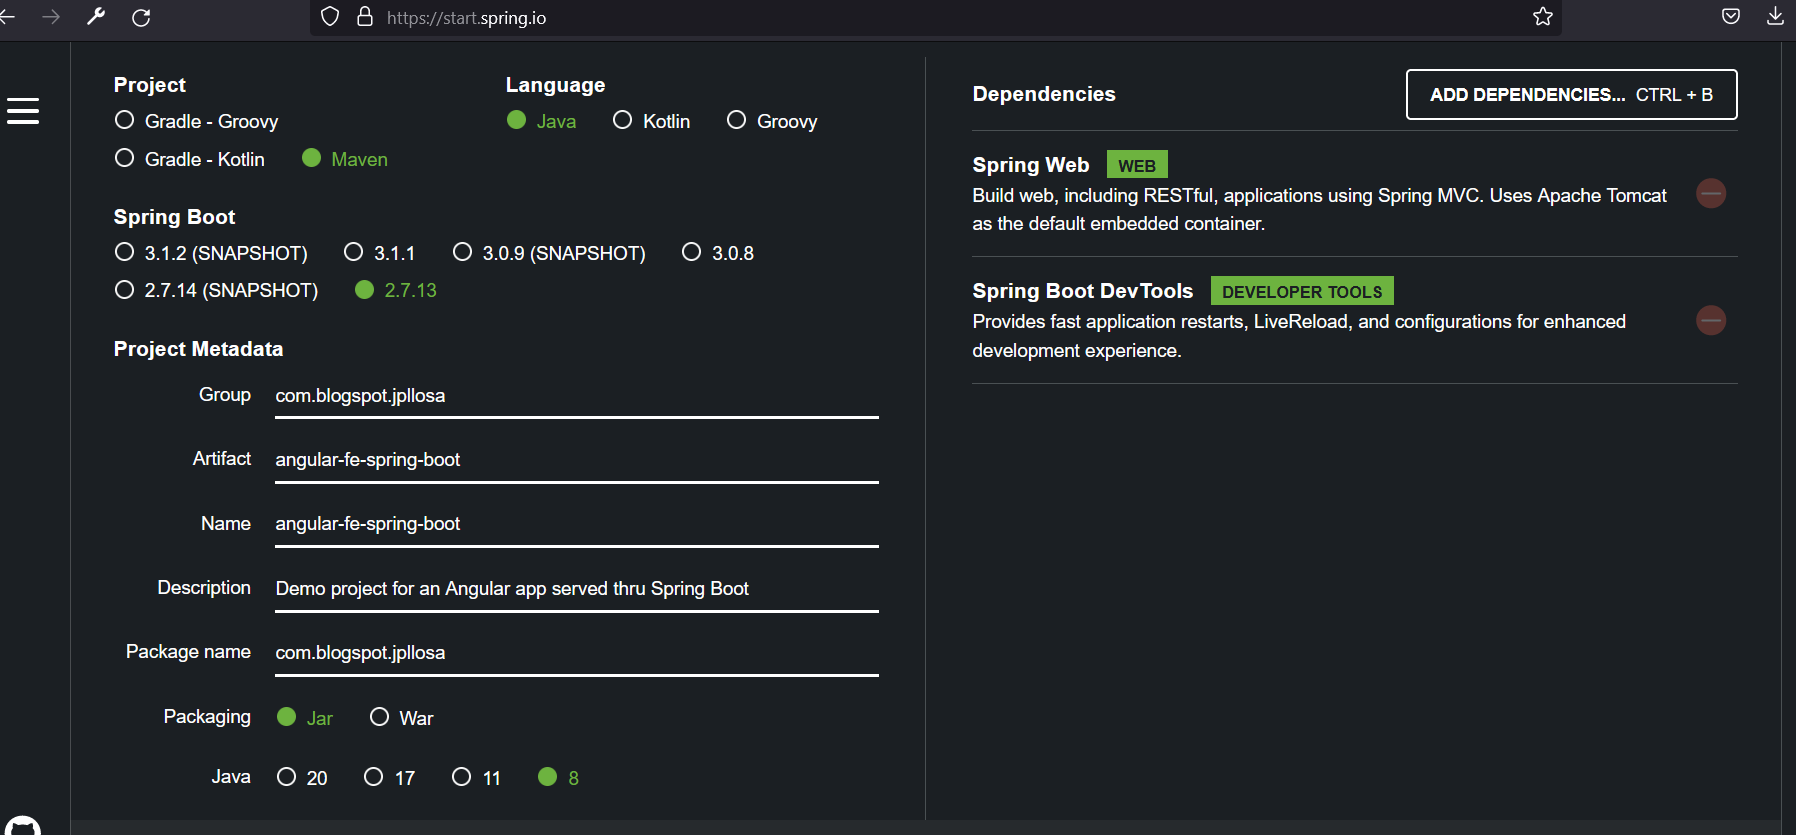
If you have been reading my past blogs, then the previous paragraphs sound so familiar. That is because I have done a similar thing for an Angular app. Essentially this article is similar to Angular FE Spring Boot Example. But I added in an extra. In my Angular FE Spring Boot Example, we had to do two steps to build the fat jar. In this article, we will build the fat jar in one step. Sounds good? Let's do it!
Building
Same as in my Angular FE Spring Boot Example, there were two ways to build a React app so that it can be deployed as single Spring Boot fat jar. First one is to use the exec-maven-plugin. Second is to use the maven-resources-plugin.
But wait. There's more. We'll be using the maven-resource-plugin in combination with frontend-maven-plugin. With these two plugins working together, we only need to run one command to build the fat jar. This means, we have leveled up from Angular FE Spring Boot Example.
Under the root directory, create a dev folder. This is where all the React stuff goes. Assuming you have Node, Node Version Manager and Node Package Manager ready, run npx create-react-app my-app to set up a web app. We should have something like below:
D:\workspace\react-fe-spring-boot\dev>npx create-react-app my-app
Need to install the following packages:
  create-react-app@5.0.1
Ok to proceed? (y) y

Creating a new React app in D:\workspace\react-fe-spring-boot\dev\my-app.

Installing packages. This might take a couple of minutes.
Installing react, react-dom, and react-scripts with cra-template...

Created git commit.

Success! Created my-app at D:\workspace\react-fe-spring-boot\dev\my-app
Inside that directory, you can run several commands:

  npm start
    Starts the development server.

  npm run build
    Bundles the app into static files for production.

  npm test
    Starts the test runner.

  npm run eject
    Removes this tool and copies build dependencies, configuration files
    and scripts into the app directory. If you do this, you can’t go back!

We suggest that you begin by typing:

  cd my-app
  npm start

Happy hacking!
We follow the bottom two commands (i.e. cd my-app, npm start) and we should have something like below. For more details, head over to Create React App. Thank you Create React App for creating our project. The React app should be available at localhost:3000.
React app on port 3000
Build the React project, npm run build. This will create files in the build directory. Take note of this folder as we will need it in our POM file. We should see something like below after the build:
D:\workspace\react-fe-spring-boot\dev>npm run build

> my-app@0.1.0 build
> react-scripts build

Creating an optimized production build...
Compiled successfully.

File sizes after gzip:

  46.61 kB  build\static\js\main.46f5c8f5.js
  1.78 kB   build\static\js\787.28cb0dcd.chunk.js
  541 B     build\static\css\main.073c9b0a.css

The project was built assuming it is hosted at /.
You can control this with the homepage field in your package.json.

The build folder is ready to be deployed.
You may serve it with a static server:

  npm install -g serve
  serve -s build

Find out more about deployment here:

  https://cra.link/deployment
Maven Bit
We don't need to change any Java code. The key is in the POM. We will copy the build files over to the classes/static folder and then Maven will take care of making the fat jar. Add the maven-resources-plugin like below (make sure you get the diretories right ;) ):
Do a mvn clean package. Now, run java -jar ./target/react-fe-spring-boot-0.0.1-SNAPSHOT.jar and we should be able to see the it running on localhost:8080. It's now being served by Tomcat.
React app on port 8080
Wait? What?! That was 2 steps to build it into a fat jar! What gives?
One Command to Build Them All
To build it all in one command, we'll enlist the help of the frontend-maven-plugin and a minor change on maven-resource-plugin. Before we do that, let's review the goals bound to the package phase, run mvn help:describe -Dcmd=package.
D:\workspace\react-fe-spring-boot>mvn help:describe -Dcmd=package

[INFO] 'package' is a phase corresponding to this plugin:
org.apache.maven.plugins:maven-jar-plugin:2.4:jar

It is a part of the lifecycle for the POM packaging 'jar'. This lifecycle includes the following phases:
* validate: Not defined
* initialize: Not defined
* generate-sources: Not defined
* process-sources: Not defined
* generate-resources: Not defined
* process-resources: org.apache.maven.plugins:maven-resources-plugin:2.6:resources
* compile: org.apache.maven.plugins:maven-compiler-plugin:3.1:compile
* process-classes: Not defined
* generate-test-sources: Not defined
* process-test-sources: Not defined
* generate-test-resources: Not defined
* process-test-resources: org.apache.maven.plugins:maven-resources-plugin:2.6:testResources
* test-compile: org.apache.maven.plugins:maven-compiler-plugin:3.1:testCompile
* process-test-classes: Not defined
* test: org.apache.maven.plugins:maven-surefire-plugin:2.12.4:test
* prepare-package: Not defined
* package: org.apache.maven.plugins:maven-jar-plugin:2.4:jar
* pre-integration-test: Not defined
* integration-test: Not defined
* post-integration-test: Not defined
* verify: Not defined
* install: org.apache.maven.plugins:maven-install-plugin:2.4:install
* deploy: org.apache.maven.plugins:maven-deploy-plugin:2.7:deploy

[INFO] ------------------------------------------------------------------------
[INFO] BUILD SUCCESS
[INFO] ------------------------------------------------------------------------
[INFO] Total time: 6.947 s
[INFO] Finished at: 2023-08-06T23:04:08+01:00
[INFO] ------------------------------------------------------------------------
First change is to make maven-resources-plugin execute on the generate-sources phase. Change validate like so.
Now, do you know why I had to show you the Maven package phases? During the package phase, the first thing that will be done by the frontend plugin will be to install node and yarn (i.e. validate phase). After that is building the React app, yarn build (i.e. initialize phase). And lastly, resources will copy the files over (i.e. generate-sources phase). Viola! We're ready to run the build again. Remove the built files (e.g. mvn clean or delete target directory, delete the React app build directory) and then do a mvn clean package. You should see something like below. After the build you should be able to run the jar like before.
D:\workspace\react-fe-spring-boot>mvn clean package
[INFO] Scanning for projects...
[INFO]
[INFO] -------------< com.blogspot.jpllosa:react-fe-spring-boot >--------------
[INFO] Building react-fe-spring-boot 0.0.1-SNAPSHOT
[INFO] --------------------------------[ jar ]---------------------------------
[INFO]
[INFO] --- maven-clean-plugin:3.2.0:clean (default-clean) @ react-fe-spring-boot ---
[INFO]
[INFO] --- frontend-maven-plugin:1.11.3:install-node-and-yarn (install-frontend-tools) @ react-fe-spring-boot ---
[INFO] Installing node version v18.10.0
[INFO] Copying node binary from C:\Users\jpllosa\.m2\repository\com\github\eirslett\node\18.10.0\node-18.10.0-win-x64.exe to D:\workspace\react-fe-spring-boot\dev\my-app\node\node.exe
[INFO] Installed node locally.
[INFO] Installing Yarn version v1.22.17
[INFO] Unpacking C:\Users\jpllosa\.m2\repository\com\github\eirslett\yarn\1.22.17\yarn-1.22.17.tar.gz into D:\workspace\react-fe-spring-boot\dev\my-app\node\yarn
[INFO] Installed Yarn locally.
[INFO]
[INFO] --- frontend-maven-plugin:1.11.3:yarn (build-frontend) @ react-fe-spring-boot ---
[INFO] Running 'yarn build' in D:\workspace\react-fe-spring-boot\dev\my-app
[INFO] yarn run v1.22.17
[INFO] $ react-scripts build
[INFO] Creating an optimized production build...
[INFO] Compiled successfully.
[INFO]
[INFO] File sizes after gzip:
[INFO]
[INFO]   46.61 kB  build\static\js\main.46f5c8f5.js
[INFO]   1.78 kB   build\static\js\787.28cb0dcd.chunk.js
[INFO]   541 B     build\static\css\main.073c9b0a.css
[INFO]
[INFO] The project was built assuming it is hosted at /.
[INFO] You can control this with the homepage field in your package.json.
[INFO]
[INFO] The build folder is ready to be deployed.
[INFO] You may serve it with a static server:
[INFO]
[INFO]   npm install -g serve
[INFO]   serve -s build
[INFO]
[INFO] Find out more about deployment here:
[INFO]
[INFO]   https://cra.link/deployment
[INFO]
[INFO] Done in 8.49s.
[INFO]
[INFO] --- maven-resources-plugin:3.2.0:copy-resources (copy-resources) @ react-fe-spring-boot ---
[INFO] Using 'UTF-8' encoding to copy filtered resources.
[INFO] Using 'UTF-8' encoding to copy filtered properties files.
[INFO] Copying 15 resources
[INFO]
[INFO] --- maven-resources-plugin:3.2.0:resources (default-resources) @ react-fe-spring-boot ---
[INFO] Using 'UTF-8' encoding to copy filtered resources.
[INFO] Using 'UTF-8' encoding to copy filtered properties files.
[INFO] Copying 1 resource
[INFO] Copying 0 resource
There you have it. Serving a Rect app through Spring Boot's fat jar and embedded Tomcat. Plus building it in one command! Grab the full repo here, github.com/jpllosa/react-fe-spring-boot
Here's an example of how to handle static web resources in Spring. Let us pretend that one of the business requirement of our Angular FE Spring Boot app is A/B testing. A/B testing is a method of comparing two versions of an app or webpage against each other to determine which one performs better. In short, we'll need a control webpage and a variant webpage. For the control webpage, there will be no changes. For the variant webpage, we'll need to inject "ab-testing.js" in the head of our webpage.
We will not be talking about how to do A/B testing. Instead, we will focus on how to inject the script tag in the head of our webpage. Requirements clear enough? Let's begin. Below is our control webpage.
As far as I know, there are two ways to fulfill this business requirement.
First one is to insert the script tag when ngOnInit is called in a Component class.
Second is to use Spring's ResourceTransformer. We will use this method because the script tag is injected server side. Prior to serving the HTML file, it is transformed. The first strategy happens on the client side which is why I think this is a better solution. This also seems better because the "ab-testing.js" is already in the head prior to DOM manipulation by Angular. So let's get to it.
POM
Update the POM file. We need the dependency below for IOUtils.
Create a com.blogspot.jpllosa.transformer package and add the following files below:
package com.blogspot.jpllosa.transformer;

import org.springframework.context.annotation.Configuration;
import org.springframework.web.servlet.config.annotation.WebMvcConfigurerAdapter;
import org.springframework.web.servlet.config.annotation.ResourceHandlerRegistry;


@Configuration
public class IndexTransformationConfigurer extends WebMvcConfigurerAdapter {
	@Override
	public void addResourceHandlers(ResourceHandlerRegistry registry) {
		registry.addResourceHandler("index.html")
			.addResourceLocations("classpath:/static/")
			.resourceChain(false)
			.addTransformer(new IndexTransformer());
	}
}
We create the class above so that we can add a handler when serving the index.html file. Here it specifies that the index.html file from the classpath:/static/ location will have to pass through a Transformer. Other static resources will not be affected. We are not caching the result of the resource resolution (i.e. resourceChain(false)).
package com.blogspot.jpllosa.transformer;

import org.apache.commons.io.IOUtils;
import org.springframework.core.io.Resource;
import org.springframework.stereotype.Service;
import org.springframework.web.servlet.resource.ResourceTransformer;
import org.springframework.web.servlet.resource.ResourceTransformerChain;
import org.springframework.web.servlet.resource.TransformedResource;
import javax.servlet.http.HttpServletRequest;
import java.io.IOException;

@Service
public class IndexTransformer implements ResourceTransformer {
	@Override
	public Resource transform(HttpServletRequest request, Resource resource, ResourceTransformerChain chain) throws IOException {
		String html = IOUtils.toString(resource.getInputStream(), "UTF-8");
		html = html.replace("<!-- INJECT_HERE -->",
			"<script src=\"//third.party.com/ab-testing.js\"> </script>");
		return new TransformedResource(resource, html.getBytes());
	}
}
We've kept our transformer simple for this example. The code is readable enough as to what it is doing, isn't it? We are replacing the placeholder text with the script tag. Job done.
Demonstration
If you have read the Angular FE Spring Boot Example then you should know what to do next. In case you have not. I'll reiterate.
Build the Angular project, ng build on dev/my-app. This will create files in the dist directory.
Run mvn clean package on the project root directory. After that, run java -jar ./target/angular-fe-spring-boot-0.0.1-SNAPSHOT.jar
and we should be able to see something like below running on localhost:8080. Is "ab-testing.js" there?
In this article we will demonstrate an Angular Front-End app served through Spring Boot's embedded Tomcat. Why do it this way? We can serve an Angular app in different ways (e.g. Apache Web Server, Nginx, etc.). What is so special about serving an Angular app through Spring Boot's Tomcat? There is nothing special. A reason could be that the development team is already well versed in Spring Boot with Tomcat. They have mastered configuring Tomcat and investing in a new web server (e.g. Nginx) is of little value. Another could be the deployment pipeline is already set up to do Java/Maven deployment (e.g. Jenkins). Lastly, it could be that you are a new hire and the development team already do it that way. That is, we don't have a choice but to support an existing Angular FE app served through Spring Boot.
Our focus will be on building the Angular app so that it can be deployed through a Spring Boot fat jar. We will lightly touch on starting a Spring Boot and Angular apps. It is assumed that the reader has knowledge regarding Node, Angular CLI, Java, Maven, Spring Boot, etc. The reader should know how to set up the mentioned technology stack.
Two Ways to Build
As far as I know, there are two ways to build an Angular app so that it can be deployed as single Spring Boot fat jar.
First one is to use the exec-maven-plugin. This plugin runs the ng build and the outputPath of the Angular app must point to src/main/resources/static so that Angular dist files are bundled in the jar during packaging.
Second is to use the maven-resources-plugin. This plugin copies the Angular dist files to the classes/static directory of the Spring Boot app. This is the method we will be demonstrating. This way seems to be cleaner because it doesn't populate any files under the Java section of the code. The Angular build code goes straight into the fat jar. This way, all Angular development code and work remain in a separate directory from the Java side of things. And only become one when we build the fat jar. So let's get to it.
Under the root directory, create a dev folder. This is where all the Angular stuff goes. Assuming you have Node, Node Version Manager and Node Package Manager ready, run npm install -g @angular/cli to install the Angular CLI. Check your installation, ng -v. We should have something like below:
Angular Version
Create an Angualr starter app under the dev folder, ng new my-app. This will create the scaffolding. Change directory to my-app, cd my-app, then run g serve. Open localhost:4200, we should have something like below:
My-App on 4200
Build the Angular project, ng build. This will create files in the dist directory. Take note of this folder as we will need it in our POM file. We should see something like below after the build:
Built Files
These are the built files found in the dist folder.
dist Contents
Maven Bit
We don't need to change any Java code. The key is in the POM. We will copy the dist files over to the classes/static folder and then Maven (mvn clean package) will take care of making the fat jar. Add the maven-resources-plugin like below (make sure you get the diretories right ;) ):
Below is the key bit when running mvn clean package. This tells us the files copied from Angular to Java classes. The number of files should match!
mvn clean package
Demonstration
Now, run java -jar ./target/angular-fe-spring-boot-0.0.1-SNAPSHOT.jar
and we should be able to see the it running on localhost:8080. Did you notice that it's on a new port this time? It's now being served by Tomcat.
My-App Served Through Spring Boot's Tomcat
There you have it. A nice way of serving an Angular app through Spring Boot's fat jar and embedded Tomcat. Grab the full repo here, github.com/jpllosa/angular-fe-spring-boot
In this article we will demonstrate the benefit of using Spring Boot and WebSocket to create an interactive web application. WebSocket is layer above TCP (Transmission Control Protocol). We will do STOMP (Streaming Text Oriented Messaging Protocol) messaging between client and server. STOMP is the protocol operating on top of WebSocket.
In my previous article, Spring Boot JMS Example, we tried to solve the UI "freezing" problem by incorporating JMS into our web application. Incorporating WebSocket is another way to solve the UI "freezing" problem. As mentioned before, we would like to avoid "blocking" the user interface or experience. If we know a user request will take a long time then we'll need a mechanism to allow the UI to continue working and not appear to "freeze". Similar to what SwingUtilities.invokeLater does. An interactive web application is a common use of WebSocket.
We will build upon the code from Spring Boot JMS Example. We will not dive into much detail on how to build the project as our focus will be on the practical application of WebSocket in our app. If you want to create the project yourself, please look at my other blogs (e.g. Spring Boot MockMvc Example) where I used Spring Initializr to create one.
That said, you can clone the finished project here, github.com/jpllosa/jms-async. We'll just go straight into explaining the code.
Dependencies
The following are the dependencies added to the POM. We won't be using any Bootstrap but just in case you want to make it look pretty, it is ready for you.
package com.blogspot.jpllosa.websocket;

import org.springframework.context.annotation.Configuration;
import org.springframework.messaging.simp.config.MessageBrokerRegistry;
import org.springframework.web.socket.config.annotation.EnableWebSocketMessageBroker;
import org.springframework.web.socket.config.annotation.StompEndpointRegistry;
import org.springframework.web.socket.config.annotation.WebSocketMessageBrokerConfigurer;

@Configuration
@EnableWebSocketMessageBroker
public class WebSocketConfig implements WebSocketMessageBrokerConfigurer {

	@Override
	public void configureMessageBroker(MessageBrokerRegistry config) {
		config.enableSimpleBroker("/topic");
		config.setApplicationDestinationPrefixes("/app");
	}

	@Override
	public void registerStompEndpoints(StompEndpointRegistry registry) {
		registry.addEndpoint("/fibonacci-websocket").withSockJS();
	}
}
The above code enables WebSocket and STOMP messaging in Spring. This is a Spring configuration class as the descriptive annotation says @Configuration. This class also enables WebSocket message handling, backed by a message broker (@EnableWebSocketMessageBroker).
In WebSocketConfig, we override two default methods. First, the configureMessageBroker() method which implements the default method in WebSocketMessageBrokerConfigurer to configure the message broker. The enableSimpleBroker() enables a simple memory-based message broker to carry the messages back to the client on destinations prefixed with /topic. It also designates the /app prefix for messages that are bound for methods annotated with @MessageMapping. This prefix will be used to define all the message mappings. For example, /app/fibonacci-id is the endpoint that the FibonacciController.fibonacciCompute() method is mapped to handle.
The registerStompEndpoints() method registers the /fibonacci-websocket endpoint, enabling SockJS fallback options so that alternate transports can be used if WebSocket is not available. The SockJS client will attempt to connect to /fibonacci-websocket and use the best available transport (websocket, xhr-streaming, xhr-polling, etc.).
Message-handling Controller
package com.blogspot.jpllosa.controller;

// ...imports snipped...

@Controller
public class FibonacciController {

	@Autowired
	JmsTemplate jmsTemplate;

	@Autowired
	HashMap myMap;

	private Fibonacci fib = new Fibonacci();

	// ...code snipped...

	@GetMapping("/stomp-fib")
	public String stompFib(@RequestParam(name="numbers", required=true) String numbers, Model model) {
		final String PENDING = "pending";

		UUID uuid = UUID.randomUUID();

		FibonacciMessage fibMsg = new FibonacciMessage(uuid.toString(),
				Integer.parseInt(numbers),
				PENDING);

		myMap.put(fibMsg.getId(), fibMsg);

		model.addAttribute("numbers", fibMsg.getNumbers());
		model.addAttribute("result", fibMsg.getResult());
		model.addAttribute("id", fibMsg.getId());

		return "stomp-fib";
	}

	@MessageMapping("/fibonacci-id")
	@SendTo("/topic/fibonacci-result")
	public FibonacciMessage fibonacciCompute(StompMessage message) {
		FibonacciMessage fibMsg = myMap.get(message.getId());

		if (fibMsg.getResult().equals("pending")) {
			String result = fib.fibonacci(fibMsg.getNumbers());
			fibMsg.setResult(result);
			System.out.println("stomp websocket: " + fibMsg);

			myMap.put(fibMsg.getId(), fibMsg);
		}

		return fibMsg;
	}
}
In Spring, STOMP messages can be routed to @Controller classes. Tha above code is added into our controller. The fibonacciCompute() method is called when a message is sent to the fibonacci-id destination. The payload is automatically bound to StompMessage. The FibonacciMessage is then broadcasted to all subscribers of /topic/fibonacci-result when the method is finished.
This methods just checks the map if it contains the ID of the fibonacci compute request. If the compute request is still pending, it then computes the fibonacci sequence then places it back into the map. Otherwise, it returns with a result. It will print the result on the console as well (e.g. stomp websocket: FibonacciMessage [id=0170491e-b44b-4831-9e2f-29422fc60482, numbers=5, result=1, 1, 2, 3, 5]) when the fibonacci sequence has been computed.
The stompFib simply serves the stomp-fib.html web content.
Message Model
package com.blogspot.jpllosa.websocket;

public class StompMessage {
	String id;

	public StompMessage() {
	}

	public StompMessage(String id) {
		this.id = id;
	}

	public String getId() {
		return id;
	}

	public void setId(String id) {
		this.id = id;
	}
}
As explained earlier, the STOMP payload is automatically bound to StompMessage. Spring handles the JSON marshalling automatically, we just need to provide the model. This models the message that carries the ID.
JavaScript Client
<!DOCTYPE HTML>
<html xmlns:th="http://www.thymeleaf.org">
<head>
    <title>Fibonacci Result via WebSocket</title>
    <meta http-equiv="Content-Type" content="text/html; charset=UTF-8" />
    <script src="/webjars/jquery/jquery.min.js"></script>
    <script src="/webjars/sockjs-client/sockjs.min.js"></script>
    <script src="/webjars/stomp-websocket/stomp.min.js"></script>
</head>
<body>
	<h1>Fibonacci Result via WebSocket</h1>
	<p th:text="'Numbers: ' + ${numbers}" />
    <p id="result" th:text="'Result: ' + ${result}" />
    <p>The result will update in a few seconds (<span id="sec"></span>).</p>
</body>

<script th:inline="javascript">
$(document).ready(function() {
	var socket = new SockJS("/fibonacci-websocket");
	var stompClient = Stomp.over(socket);
	var $result = $("#result");
	var $sec = $("#sec");
	var timer;
	var counter = 1;

	stompClient.connect({}, function(frame) {
		console.log("connected");
		stompClient.subscribe("/topic/fibonacci-result", function(message) {
			var fibMsg = JSON.parse(message.body);
			$result.text("Result: " + fibMsg.result);
			clearInterval(timer);

			setTimeout(function() {
				if (stompClient !== null) {
			        stompClient.disconnect();
			        console.log("disconnected");
			    }
			}, 5000);
		});

		setTimeout(function() {
			stompClient.send("/app/fibonacci-id", {}, JSON.stringify({
				id: [[${id}]],
			}));

			timer = setInterval(function() {
				$sec.text(counter);
				counter++;
			}, 1000);
		}, 1000);
	});
});
</script>
</html>
Our stomp-fib.html has a lot more code compared to the HTMLs in Spring Boot JMS Example. Here we import the sockjs.min.js and stomp.min.js libraries that will be used to communicated with our server through STOMP over WebSocket.
Here is what the JavaScript code section does. When the HTML document is fully loaded it instantiates a SockJS object which opens a connection to /fibonacci-websocket then use STOMP over it. We then subscribe for messages to the /topic/fibonacci-result destination. Whenever a message is received, it will update the DOM and clear the timer, then disconnect. Upon connection, we wait for a second then send a STOMP message to trigger the fibonacci computation and then interactively update the DOM showing the elapsed time in seconds.
Demonstration
To demonstrate, open the /stomp-fib endpoint (e.g. http://localhost:8080/stomp-fib?numbers=5). Don't forget to run the Spring Boot App! You should have something like below:
There you have it. Another way of solving the UI "freezing" problem with Spring Boot WebSocket.
In this article we will demonstrate the benefit of using Spring Boot Java Message Service (JMS) for asynchronous processing. JMS is used as a way to allow asynchronous request processing in our web application. One reason you would to like do this is to avoid "blocking" the user interface or experience. If you know a user request will take a long time then you'll need a mechanism to allow the UI to continue working and not appear to "freeze". Similar to what SwingUtilities.invokeLater does. There are also other uses for JMS but generally and most common is queueing requests that take too long to process.
We will not dive into much detail on how to build the project as our focus will be on the practical application of JMS in our app. If you want to create the project yourself, please look at my other blogs (e.g. Spring Boot MockMvc Example) where I used Spring Initializr to start one. Here's what your Spring Initializr should look like:
That said, you can clone the finished project here, github.com/jpllosa/jms-async. We'll just go straight into explaining the code.
JMS Configuration
package com.blogspot.jpllosa;

import java.util.HashMap;

import javax.jms.ConnectionFactory;

import org.springframework.boot.SpringApplication;
import org.springframework.boot.autoconfigure.SpringBootApplication;
import org.springframework.boot.autoconfigure.jms.DefaultJmsListenerContainerFactoryConfigurer;
import org.springframework.context.annotation.Bean;
import org.springframework.jms.annotation.EnableJms;
import org.springframework.jms.config.DefaultJmsListenerContainerFactory;
import org.springframework.jms.config.JmsListenerContainerFactory;
import org.springframework.jms.support.converter.MappingJackson2MessageConverter;
import org.springframework.jms.support.converter.MessageConverter;
import org.springframework.jms.support.converter.MessageType;

import com.blogspot.jpllosa.messaging.FibonacciMessage;

@SpringBootApplication
@EnableJms
public class JmsAsynchronousProcessingApplication {

	public static void main(String[] args) {
		SpringApplication.run(JmsAsynchronousProcessingApplication.class, args);
	}

	@Bean
	public JmsListenerContainerFactory myFactory(ConnectionFactory connectionFactory,
			DefaultJmsListenerContainerFactoryConfigurer configurer) {
		DefaultJmsListenerContainerFactory factory = new DefaultJmsListenerContainerFactory();

		configurer.configure(factory, connectionFactory);

		return factory;
	}

	@Bean
	public MessageConverter jacksonJmsMessageConverter() {
		MappingJackson2MessageConverter converter = new MappingJackson2MessageConverter();
		converter.setTargetType(MessageType.TEXT);
		converter.setTypeIdPropertyName("_type");
		return converter;
	}

	@Bean
	public HashMap myMap() {
		return new HashMap();
	}
}
In the above code, we have configured JMS with Spring to send and receive messages. The @SpringBootApplication is a convenience annotation that does the following:
Tags the class a source of beand definitions akin to @Configuration.
Tells Spring Boot to add beans based on the classpath settings, other beans and property settings.
Tells Spring Boot to find other components, configurations and services in the package akin to @ComponentScan.
The @EnableJms triggers the discovery of methods annotated with @JmsListener and then Spring Boot creates the message listener for this. The myFactory is referenced in the JmsListener of the receiver, FibonacciCompute.receiveFibonacciMessage(). We use Jackson to serialize the content in text format. Spring Boot detects the MessageConverter and associates it to both the default JmsTemplate and any JmsListenerContainerFactory.
Last but not the least is the so called "database". Could have created a static map here but opted instead to make it a bean so I can just auto wire it.
Message Reveiver
package com.blogspot.jpllosa.messaging;
import java.util.HashMap;
import org.springframework.beans.factory.annotation.Autowired;
import org.springframework.jms.annotation.JmsListener;
import org.springframework.stereotype.Component;
import com.blogspot.jpllosa.service.Fibonacci;
@Component
public class FibonacciCompute {
@Autowired
HashMap myMap;
private Fibonacci fib = new Fibonacci();
@JmsListener(destination = "fibonacciCompute", containerFactory = "myFactory")
public void receiveFibonacciMessage(FibonacciMessage fibMsg) {
String result = fib.fibonacci(fibMsg.getNumbers());
fibMsg.setResult(result);
System.out.println(fibMsg);
myMap.put(fibMsg.getId(), fibMsg);
}
}
The JmsListener annotation defines the name of the destination that this method should listen to and the reference to the JmsListenerContainerFactory to use. When a message is received, it computes the fibonacci sequence. Once it has a result, it is stored in the map "database". This map will then be accessed later as you will see. It will print the result on the console as well (e.g. FibonacciMessage [id=f2f175e3-05d9-4ea2-89ae-02777242c7de, numbers=8, result=1, 1, 2, 3, 5, 8, 13, 21]) when the fibonacci sequence has been computed.
package com.blogspot.jpllosa.service;
public class Fibonacci {
public String fibonacci(int numbers) {
try {
Thread.sleep(5000);
} catch (InterruptedException e) {
// don't care
}
if (numbers < 0) return "";
if (numbers == 0) return "0";
if (numbers == 1) return "1";
StringBuilder sb = new StringBuilder();
int num1 = 0;
int num2 = 1;
sb.append(num2);
for (int i = 1; i < numbers; i++) {
if (sb.length() > 0) {
sb.append(", ");
}
int sumOfPreviousTwo = num1 + num2;
sb.append(sumOfPreviousTwo);
num1 = num2;
num2 = sumOfPreviousTwo;
}
return sb.toString().trim();
}
private int fibonacciCompute(int numbers) {
if (numbers == 1 || numbers == 2) return 1;
return fibonacciCompute(numbers - 2) + fibonacciCompute(numbers - 1);
}
public String fibonacciRecursion(int numbers) {
if (numbers == 0) return "0";
StringBuilder sb = new StringBuilder();
for (int i = 1; i <= numbers; i ++) {
if (sb.length() > 0) {
sb.append(", ");
}
sb.append(fibonacciCompute(i));
}
return sb.toString().trim();
}
}
I'll explain the code along with the demonstration below.
Demonstration
First off, let's see what happens when we don't use JMS and a long process is going to take place. To demonstrate this, hit the /fib endpoint (e.g. http://localhost:8080/fib?numbers=5). I've intentionally added the 5 second delay to simulate a long process. As you will notice, the user inteface took a long while to render the page. A user might assume that the web page has frozen. We don't want that. Opening web tools + Network tab, we see the turle icon when we did the request. The turtle means it had a slow server response time (x secs). The recommended limit is 500ms.
Now let's see what happens when we use JMS and a long process is going to take place. To demonstrate this, hit the /jms-fib endpoint (e.g. http://localhost:8080/jms-fib?numbers=8). As you might have noticed, there is a little difference in the implementation. We had to create a unique ID associating the request. We also returned a "pending" message right away along with a link the user can click for updates of the fibonacci computation request. When we received the request it was simple call to convertAndSend. With the destination specified and plain old Java object, of course. In contrast to the previous /fib call, we got a web page straight away and it took like 5ms.
For the results, we click the link below (e.g. http://localhost:8080/fib-updates/) and if it is still pending we can reload the page. Then we see something like below:
Now you've seen JMS in action. We have demonstrated the benefit of Spring Boot Java Message Service for asynchronous processing. There you have it. A simple example of how to use JMS to allow asynchronous request processing in our web application and not "freezing" the UI.