Now that you got your monitoring up and running, what's next? Do you relax, put your feet up and read Jack Reacher Tripwire? I'm sure your boss will say "Can this notify us when something is wrong? Like send an email or something. There you go. This bit is about adding that send email functionality.
The code is in here, Crowsnest and here's what changed, pull request. Anyway, let's talk about what was added for this monitoring app to be able to send an email.
Additional Dependency
With the addition of below in the pom.xml, you receive Spring's sending email bells and whistles. Spring Boot will provide auto-configuration and abstraction for sending email by using the JavaMailSender interface.
You might want to customized the configuration of JavaMarlSender. It can be added in the application.properties file using the spring.mail namespace. Some default timeout values are infinite, so you might want to add some properties like below to avoid freezing your app because of an unresponsive SMTP server.
Here's the meat of the send email operation. By default, if spring.mail.host and the Spring Mail libraries are defined, you can inject JavaMailSender automatically. The email sender proxy defined will be the sender. I think the variables are descriptive enough as to what it is for, isn't it? We got a "to", our destination email. Subject of the email and the text which will be the body of the email. Clear enough? Great!
package net.codesamples.crowsnest;

import org.springframework.beans.factory.annotation.Autowired;
import org.springframework.beans.factory.annotation.Value;
import org.springframework.mail.SimpleMailMessage;
import org.springframework.mail.javamail.JavaMailSender;
import org.springframework.stereotype.Component;

@Component
public class EmailService {

    @Autowired
    private JavaMailSender mailSender;

    @Value("${email.sender.proxy}")
    private String emailSenderProxy;

    public void sendEmailMessage(String to, String subject, String text) {
        SimpleMailMessage message = new SimpleMailMessage();
        message.setFrom(emailSenderProxy);
        message.setTo(to);
        message.setSubject(subject);
        message.setText(text);

        mailSender.send(message);
    }
}
Spring Boot Send Email Trigger
Next is when do we want it to send an email? Of course as soon as something goes down. Fairly simple, just @Autowire the EmailService component and call the send email message method in our SchedulePings class.
We have a feature flag as well. So if emailFeatureEnabled is set to true, we send the email. Otherwise we don't.
Spring Boot Send Email Test
Alright, time to see if this send email thing works. First thing we'll need is an SMTP server that will handle emails being sent. I'm using an old version of smtp4dev but there is a new one which is definitely better. Anyway, run Crowsnest and bring a system down that it is monitoring. You should be able to figure that out. Smtp4dev will look like below.
Email details will look like below.
Spring Boot Send Email Wrap Up
Congratulations. Your app can now spam the hell out of the monitoring team. To recap, we added Spring Boot's starter mail dependency. Then added the properties. After that, created a component to handle the email service. Lastly, find an entry point in our monitoring code as to when to invoke sending the email. Short and sweet.
Have you ever encountered Spring's WebClient throwing a "failed to resolve 'hostname' after x queries" error?. Well, if you ran my Crowsnest project prior to my latest merge, then chances are you may have. Especially, if you ran it inside your internal network. Here's what the error looks like.
Spring WebClient Failed to Resolve Cause
As the error states, the target hostname can't be resolved. It is a DNS thing. By default WebClient uses the JVM implementation to resolve the hostname. In my case, my Linux box was inside a VPN and somehow Java's standard networking library (e.g. java.net.InetAddress) was ignoring the local DNS settings. Worked fine when the target was accessible in the Internet.
Spring WebClient Failed to Resolve Sorted
To solve this dilemma, we simple change the default hostname resolver to something that can do the job. Luckily, there is Netty's DNS resolver we can use. It is io.netty.resolver.DefaultAddressResolverGroup, and we just tell Spring to use it. So WebClient will now use Netty's DNS Resovler thru HttpClient and no longer the default JVM implementation. We'll need to change a couple of things in our code.
Create a new WebClient that will be injected in other parts of the code.
package net.codesamples.crowsnest;

// ... other imports snipped
import io.netty.resolver.DefaultAddressResolverGroup;
import reactor.netty.http.client.HttpClient;

@SpringBootApplication
@EnableScheduling
public class CrowsnestApplication {

	public static void main(String[] args) {
		SpringApplication.run(CrowsnestApplication.class, args);
	}

	@Bean
	public WebClient webClient() {
		HttpClient httpClient = HttpClient.create().resolver(DefaultAddressResolverGroup.INSTANCE);
		return WebClient.builder()
				.clientConnector(new ReactorClientHttpConnector(httpClient)).build();
	}
}
Use the bean in other parts of the code thru @Autowired.
package net.codesamples.crowsnest;

// ... impoerts snipped

@Component
public class ScheduledPings {
    private static final Logger log = LoggerFactory.getLogger(ScheduledPings.class);

    private static final SimpleDateFormat dateFormat = new SimpleDateFormat("HH:mm:ss");

    @Autowired
    EnvironmentConfigurationWatcher environmentConfigurationWatcher;

    @Autowired
    SimpMessagingTemplate simpMessagingTemplate;

    @Autowired
    private WebClient webClient;

    private List internalEnvironmentList = new ArrayList<>();

    private ObjectMapper mapper = new ObjectMapper();

    @Scheduled(cron = "${cron.expression}")
    public void pinger() {
        log.info("The time is now {}", dateFormat.format(new Date()));
        List environmentList = environmentConfigurationWatcher.getEnvironmentList();
        log.info("Environment list: {}", environmentList);

        for (Environment environment : environmentList) {
            for (App app : environment.getApps()) {
                Mono mono = webClient.get()
                        .uri(app.getUrl())
                        .exchangeToMono(clientResponse -> {
                            HttpStatusCode statusCode = clientResponse.statusCode();
                            if (statusCode.is2xxSuccessful()) {
                                app.setStatus("up");
                            }
                            log.info("StatusCode: {} = {}", statusCode, app.getUrl());
                            return clientResponse.bodyToMono(String.class);
                        })
                        .onErrorResume(Exception.class, exception -> {
                            log.info("Exception {}", exception.getMessage());
                            app.setStatus("down");
                            return Mono.empty();
                        });
                mono.subscribe();
            }
        }

// ... code snipped
}
Spring WebClient Failed to Resolve Fixed
Things should now work again. If it does not, let me know.
Alright, now that you got a docker image in the previous example, Dockerize Spring Boot App Example, what now? The most obvious next step is to spin up the docker image in a Kubernetes cluster. But GKE (Google Kubernetes Engine) is bloody expensive for us mere mortals. Luckily we can practice Kubernetes stuff with Docker Desktop.
First up is to start a Kubernetes cluster via Docker Desktop. Should just be a bunch of clicks. I just chose a single node cluster (Kubeadm). You should have something like below:
And if you have Lens K8S IDE. You'll have something like below.
Deploy to Kubernetes
First, let's check our image (docker images). Like so:
C:\workspace>docker images
                                                                                                    i Info →   U  In Use
IMAGE                                                                   ID             DISK USAGE   CONTENT SIZE   EXTRA
crowsnest:v1.0.0                                                        b9bfb190828e        567MB          197MB    U
Let's make sure we deploy to docker desktop kubernetes.
C:\workspace>kubectl config use-context docker-desktop
Switched to context "docker-desktop".
And the fun starts, create a deployment.
C:\workspace>kubectl create deployment crowsnest --image=crowsnest:v1.0.0
deployment.apps/crowsnest created
After deployment, take a look at Lens and Docker Desktop.
Or if you like CLI.
C:\workspace>kubectl get pods
NAME                        READY   STATUS    RESTARTS   AGE
crowsnest-f56bb85ff-t9dn9   1/1     Running   0          28m
Well and good so far. But our web app is not reachable from the browser yet. We need to expose the port of the pod so we can get to the web app. Do note that your pod name might be different from this example.
C:\workspace>kubectl expose pod crowsnest-f56bb85ff-t9dn9 --port=8080 --name=crowsnest --type=LoadBalancer
service/crowsnest exposed

C:\workspace>kubectl get services
NAME         TYPE           CLUSTER-IP     EXTERNAL-IP   PORT(S)          AGE
crowsnest    LoadBalancer   10.100.27.69   localhost     8080:31912/TCP   97s
kubernetes   ClusterIP      10.96.0.1              443/TCP          4d3h
You should have something like below.
Perfecto! We should be able to access Crowsnest on the browser now. localhost:8080.
Thank you Docker Desktop for helping us save money by practicing kubectl stuff with you, instead of the expensive GKE. Deploying to GKE should be similar. Just need to point kubectl to GKE.
Undeploy from Kubernetes
Most importantly when doing this on a paid Kubernestes service, don't forget to delete the pod, service, deployment, etc. GKE billing is astronomical (delete the project too to be sure!) Here are the commands to undo what you've done.
C:\workspace>kubectl delete service crowsnest --now
service "crowsnest" deleted from default namespace

C:\workspace>kubectl delete deployment crowsnest --now
deployment.apps "crowsnest" deleted from default namespace

C:\workspace>kubectl get services
NAME         TYPE        CLUSTER-IP   EXTERNAL-IP   PORT(S)   AGE
kubernetes   ClusterIP   10.96.0.1            443/TCP   4d3h

C:\workspace>kubectl get pods
No resources found in default namespace.
Deploy to Kubernetes Wrap Up
Yes, we did all of the above steps manually. Yes, this can all be automated. But before we automate stuff, we have to do it manually. For example, you can create a GitHub action workflow to do all of the above steps to spin up your docker image to GKE, just with a yaml file. That would be another story. Happy spinning!
One of the benefits of a dockerize app (dockerize is synonymous with containerization, just like googling is to web searching) is the ease of deployment to different environments. Once you got that docker image built, you can stick it in any environment you like. Shall we dockerize your Spring Boot app? Here's a quick example.
Before we can run the docker file, let's build the project first. Run, mvn clean install in IntelliJ or via command line. That should create a target directory. Now, let's take a look at the Dockerfile found at the root directory.
FROM eclipse-temurin:17-jdk-alpine
RUN addgroup -S crowsnest && adduser -S crowsnest -G crowsnest
USER crowsnest:crowsnest
COPY docker-files/ app-files
ARG JAR_FILE=target/*.jar
COPY ${JAR_FILE} crowsnest.jar
ENTRYPOINT ["java", "-jar", "crowsnest.jar", "--spring.config.location=/app-files/application.properties"]
What does above file mean? What will it do? FROM means that this is the base image. Our crowsnest image will extend from this image. Docker Hub contains a lot of Docker images that are suitable as base images. In this case our base image is built by Eclipse Temurin loaded with OpenJDK 17.
The RUN command will execute the Alpine Linux shell commands addgroup and adduser. The end result is a user called crowsnest belonging to the crowsnest group. This user will run the Crowsnest Spring Boot app. We don't want root running the app. The -S is a flag for system services or daemon group.
The USER command will set the user name and user group to crowsnest as the default user and group. This user is used for succeeding RUN, ENTRYPOINT, and CMD commands.
The COPY command, as it says, will copy the files in our local docker-files directory to the app-files directroy in the Alpine Linux image.
The ARG command defines the JAR_FILE variable that is passed at build time to the builder.
The next COPY command, copies all the jar files from the target directory into a single jar called crowsnest.jar.
Lastly ENTRYPOINT command configures the container to run as an executable. In this case, it will run java with the -jar and --spring.config.location parameters.
Right, let's build the image using the docker build command. Like so:
C:\workspace\crowsnest>docker build -t crowsnest:v1.0.0 .
[+] Building 5.2s (8/8) FINISHED docker:desktop-linux
=> [internal] load build definition from Dockerfile
The above command builds the crowsnest image with the image identifier (i.e tag) crowsnest:v1.0.0 on the current path. I sometimes add the option --no-cache to not use cache when building the image. After a successful build, you should have something like below. Old school way is docker images on the CLI (Command Line Interface.
Running the Docker Image
Righto, let's see this image in action. Go to the command line and run docker run -p 8080:8080 crowsnest:v1.0.0. This command will create and run a new container from the image tagged crowsnest:v1.0.0 exposing port 8080 and routing incoming requests to Crowsnest running on port 8080. In the words, the first 8080 is the container port number. The second is your app's port number. You should have something like below.
C:\workspace\crowsnest>docker run -p 8080:8080 crowsnest:v1.0.0

  .   ____          _            __ _ _
 /\\ / ___'_ __ _ _(_)_ __  __ _ \ \ \ \
( ( )\___ | '_ | '_| | '_ \/ _` | \ \ \ \
 \\/  ___)| |_)| | | | | || (_| |  ) ) ) )
  '  |____| .__|_| |_|_| |_\__, | / / / /
 =========|_|==============|___/=/_/_/_/

 :: Spring Boot ::                (v3.5.9)

2026-02-18T15:26:52.406Z  INFO 1 --- [crowsnest] [           main] n.c.crowsnest.CrowsnestApplication       : Starting CrowsnestApplication v0.0.1-SNAPSHOT using Java 17.0.17 with PID 1 (/crowsnest.jar started by crowsnest in /)
2026-02-18T15:26:52.409Z  INFO 1 --- [crowsnest] [           main] n.c.crowsnest.CrowsnestApplication       : No active profile set, falling back to 1 default profile: "default"
2026-02-18T15:26:53.293Z  INFO 1 --- [crowsnest] [           main] o.s.b.w.embedded.tomcat.TomcatWebServer  : Tomcat initialized with port 8080 (http)
2026-02-18T15:26:53.307Z  INFO 1 --- [crowsnest] [           main] o.apache.catalina.core.StandardService   : Starting service [Tomcat]
2026-02-18T15:26:53.307Z  INFO 1 --- [crowsnest] [           main] o.apache.catalina.core.StandardEngine    : Starting Servlet engine: [Apache Tomcat/10.1.50]
2026-02-18T15:26:53.343Z  INFO 1 --- [crowsnest] [           main] o.a.c.c.C.[Tomcat].[localhost].[/]       : Initializing Spring embedded WebApplicationContext
2026-02-18T15:26:53.344Z  INFO 1 --- [crowsnest] [           main] w.s.c.ServletWebServerApplicationContext : Root WebApplicationContext: initialization completed in 878 ms
2026-02-18T15:26:53.796Z  INFO 1 --- [crowsnest] [           main] o.s.b.a.w.s.WelcomePageHandlerMapping    : Adding welcome page: class path resource [static/index.html]
2026-02-18T15:26:53.974Z  INFO 1 --- [crowsnest] [           main] o.s.m.s.b.SimpleBrokerMessageHandler     : Starting...
If you are not old school, the docker desktop UI will look like so:
You can start/stop the image from running via the Actions button. Chances are you might experience some connectivity problems. Can't connect to an API or database. Click on the three dots then "Open in terminal". This should give you a shell prompt like below. As you can see, we are running Alpine Linux. Remember FROM eclipse-temurin:17-jdk-alpine? On the root directory is app-files and crowsnest.jar. Built with the following commands COPY docker-files/ app-files and COPY ${JAR_FILE} crowsnest.jar. Here, you can try ping, curl, wget, telnet, etc. to check connectivity. Excellent!
Dockerize a Spring Boot App
Outstanding. We have built and ran a docker image. We can spin this image up in any environment we like. To recap, we build our image from a base image then add what we need like the necessary configuration files, the application itself, etc. Finally, we specify our app as the default executable. Happy dockerizing!
Want to send notifications to your WebSocket clients? What if you want to send messages to connected clients so they can update their UI? You definitely can send messages from the back-end (e.g. from any part of your application). Any application component can send messages to the message broker. The easiest way to do so is to inject a SimpMessagingTemplate and use it to send messages. Typically, you would inject it by type. If another bean of the same type exists, qualify it by name (@Qualifier).
My example is taken from my simple monitoring app, Crowsnest (Crowsnest repository in GitHub). Here's the code where I use SimpMessagingTemplate. This web app just checks whether sites are online or offline.
package net.codesamples.crowsnest;

... imports snipped ...

@Component
public class ScheduledPings {
    private static final Logger log = LoggerFactory.getLogger(ScheduledPings.class);

    private static final SimpleDateFormat dateFormat = new SimpleDateFormat("HH:mm:ss");

    @Autowired
    EnvironmentConfigurationWatcher environmentConfigurationWatcher;

    @Autowired
    SimpMessagingTemplate simpMessagingTemplate;

    private WebClient webClient = WebClient.create();

    private List internalEnvironmentList = new ArrayList<>();

    private ObjectMapper mapper = new ObjectMapper();

    @Scheduled(cron = "${cron.expression}")
    public void pinger() {
        log.info("The time is now {}", dateFormat.format(new Date()));
        List environmentList = environmentConfigurationWatcher.getEnvironmentList();
        log.info("Environment list: {}", environmentList);

        for (Environment environment : environmentList) {
            for (App app : environment.getApps()) {
                Mono mono = webClient.get()
                        .uri(app.getUrl())
                        .exchangeToMono(clientResponse -> {
                            HttpStatusCode statusCode = clientResponse.statusCode();
                            if (statusCode.is2xxSuccessful()) {
                                app.setStatus("up");
                            }
                            log.info("StatusCode: {} = {}", statusCode, app.getUrl());
                            return clientResponse.bodyToMono(String.class);
                        })
                        .onErrorResume(Exception.class, exception -> {
                            log.info("Exception {}", exception.getMessage());
                            app.setStatus("down");
                            return Mono.empty();
                        });
                mono.subscribe();
            }
        }

        if (internalEnvironmentList.isEmpty()) {
            internalEnvironmentList = deepCopy(environmentList);
            simpMessagingTemplate.convertAndSend("/topic/environments", internalEnvironmentList);
        } else {
            if (!areTheSame(environmentList, internalEnvironmentList)) {
                log.info("environmentList NOT equal to internalEnvironmentList: \n {} \n {}",
                        environmentList, internalEnvironmentList);
                internalEnvironmentList = deepCopy(environmentList);
                simpMessagingTemplate.convertAndSend("/topic/environments", internalEnvironmentList);
            } else {
                log.info("environmentList equal to internalEnvironmentList");
            }
        }
    }

    private List deepCopy(List src) {
	    ... snipped ...
    }

    private boolean areTheSame(List list1, List list2) {
        ... snipped ...
    }
}
Straight to the point and no lollygagging, on lines 15, 52, and 58 are where the magic happens. So we let Spring inject the SimpMessagingTemplate, then send the message to the target destination. In this example, the destination is "/topic/environments". This is mapped to a method in a controller class. And that is how you update your connected clients via WebSocket.
In this example, on initial load where the environment list is still empty, we update all connected clients. The clients are updated as well when there is a change in the environment list. Here easily validated by checking if the old list matches the new list.
For setting up WebSocket on your Spring Boot app, front-end and back-end basics, I'll point you to my previous blog, Spring Boot WebSocket Example
Demonstration
I'm using IntelliJ IDEA 2023.3.4 (Community Edition). You can use any IDE you like. You can even go command line! Start up the Crowsnest web app. Once it has started, it should be accessible on http://localhost:8080 and you should have something like below when connected. Go ahead, click the connect button. Pay attention to the web console logs. Notice the JSON environments list.
Now, let's edit the environments.json file to force the back-end to notify the clients. For this, I'm just going to add "New" to the title. From "Development" to "New Development". On the back-end logs. The old environment list will not be equal to the new environment list which will trigger a publish message to the topic. You should see something like this on the logs.
Alright, we got a new title. Let's head back to the browser. It should now render the new title and you'll also see it log the new environment list. Like so.
Spring SimpMessagingTemplate
Now you don't need to poll the back-end incessantly. All you have to do is connect via WebSocket and wait for any notification. That should relieve the front-end of keeping up to date. Thank you for reading and happy WebSocket-ing.
This is part two of the GCP (Google Cloud Platform) PubSub example. Part one is GCP PubSub Send Example. In part one, we learned how to set up GCP admin stuff (e.g. billing), GCP PubSub (e.g. topic), Google Cloud SDK Shell, and a lot more. So if you want to know how to make this example work, please read part one first. I am going straight into the GCP PubSub receive code and will not be discussing about how things are set up. That's covered in part one, please do have a read.
As with part one, GCP PubSub Send Example. There are no changes to our pom.xml. It will have the same dependencies.
Spring Web (<artifactId>spring-boot-starter-web</artifactId>) - Build web, including RESTful, applications using Spring MVC. Uses Apache Tomcat as the default embedded container.
Spring Integration (<artifactId>spring-boot-starter-integration</artifactId>, <artifactId>spring-integration-http</artifactId>) - Adds support for Enterprise Integration Patterns. Enables lightweight messaging and supports integration with external systems via declarative adapters.
Google Cloud Messaging (<artifactId>spring-cloud-gcp-starter-pubsub</artifactId>) - Adds the Google Cloud Support entry and all the required dependencies so that the Google Cloud Pub/Sub integration work out of the box.
Our GCP PubSub message receive code is short and sweet. Just like the send code. We subscribe to a GCP PubSub topic and when a message is receive, we print it out to the console. Here's the code. Explanation follows after.
package com.blogspot.jpllosa;

// imports snipped...

@SpringBootApplication
@RestController
public class GcpPubsubApplication {

// some send code snipped...

	@PostMapping("/postMessage")
	public RedirectView postMessage(@RequestParam("message") String message) {
		this.messagingGateway.sendToGcpPubsub(message);
		return new RedirectView("/");
	}

	// Receive
	@Bean
	public MessageChannel gcpPubsubInputChannel() {
		return new DirectChannel();
	}

	@Bean
	public PubSubInboundChannelAdapter messageChannelAdapter(
			@Qualifier("gcpPubsubInputChannel") MessageChannel inputChannel,
			PubSubTemplate pubSubTemplate) {
		PubSubInboundChannelAdapter adapter =
				new PubSubInboundChannelAdapter(pubSubTemplate, "gcp-pubsub-example-sub");
		adapter.setOutputChannel(inputChannel);

		return adapter;
	}

	@ServiceActivator(inputChannel = "gcpPubsubInputChannel")
	public void messageReceiver(String message) {
		System.out.println("Message received: " + message);
	}

}
The same with part one, only the GCP PubSub receive bits will be explained. Incoming messages will arrive on the MessageChannel (DirectChannel) we created. Simliar to sending, we have an inbound channel adapter that receives messages from GCP PubSub and forwards it to gcpPubsubInputChannel. The inbound channel adapter is linked to the GCP PubSub subscription name. The adapter is bound and listens for new messages from GCP PubSub gcp-pubsub-example-sub subscription. The method annotated with @ServiceActivator is called when new messages arrive at gcpPubsubInputChannel and we simply print the message on the console. Short and sweet.
Spring Boot GCP PubSub Receive in Action
Let's see our code in action. Run the Spring Boot app (e.g. mvnw spring-boot:run) or thru IntelliJ. When the app is ready, hit the /postMessage endpoint and you should have something like below printed on the console.
$ curl --data "message=GCP Pubsub send and receive!" localhost:8080/postMessage
We won't be able to see any messages in the GCP PubSub messages section because this happens very quick. If you want to see the messages sent on the messages tab, click PULL to delay the message being consumed. The delay is about 5-ish seconds. It would look like the below.
Spring Boot GCP PubSub Receive Wrap Up
There you have it. Your travel to GCP PubSub has come full circle, assuming you read part one of course. As per usual, we give thanks to Spring for making it easy for us by abstracting whatever it is happening under the hood. Alternatively, you can use other client libaries to connect to GCP PubSub. We created an input channel and attached it to a channel adapter that has subscribed to GCP PubSub. Viola and that is all there is to it! Thank you for reading.
If you are working on Shopify and you need to monitor webhook events (e.g. an order has been created), chances are you'll be directed to use Google Pub/Sub messaging service. In this blog, I'll show you how to setup PubSub on the Google Cloud Platform (GCP), then send a message and check the message on GCP PubSub cloud console.
Assign your new project with billing. As of this writing, Google provides free credits to new customers and free usage limits. For Google PubSub, it is 10 GB of messages per month. Please verify for yourselves if this is still the case. Here's what creating a billing account looks like and it being connected to the project ID.
Now that the administrative stuff has all been set up, it's time to create a PubSub topic and subscription.
Google Cloud SDK Shell Setup
Install and initialize the Google Cloud SDK. For installing the Google Cloud SDK Shell, it is better to get it from the horses' mouth. Please follow the Google Cloud documentation on how to install and initialiaze it for your project. Once initialized, enable GCP PubSub. Here are a few checkpoints so you'll know you are heading in the right direction. First and foremost, you must log in with application default credentials using the following command, gcloud auth application-default login. When you are logged, you should have something like below.
Next is to set the shell to your project, gcloud config set project <PROJECT-NAME>. Here's the command to see the available projects, gcloud config projects list. When you have done those, you should have something like below.
Lastly, enable GCP PubSub, gcloud services enable pubsub.googleapis.com. Output would look like below.
For Windows, we can verify that our Google credentials are saved by looking under C:\Users\username\AppData\Roaming\gcloud\application_default_credentials.json. This file should exist.
Spring Boot GCP PubSub Send Code
I used Spring Initialzr to create the skeleton project. The following are the dependencies we need:
Spring Web - Build web, including RESTful, applications using Spring MVC. Uses Apache Tomcat as the default embedded container.
Spring Integration - Adds support for Enterprise Integration Patterns. Enables lightweight messaging and supports integration with external systems via declarative adapters.
Google Cloud Messaging - Adds the Google Cloud Support entry and all the required dependencies so that the Google Cloud Pub/Sub integration work out of the box.
Our pom.xml should at least have the following dependencies.
Our GCP PubSub message sender code is short and sweet. When an HTTP POST is received, it then submits the message to GCP PubSub. Here's the code. Explanation follows after.
package com.blogspot.jpllosa;

// imports snipped...

@SpringBootApplication
@RestController
public class GcpPubsubApplication {

	public static void main(String[] args) {
		SpringApplication.run(GcpPubsubApplication.class, args);
	}

	@MessagingGateway(defaultRequestChannel = "gcpPubsubOutputChannel")
	public interface GcpPubsubOutboundGateway {
		void sendToGcpPubsub(String text);
	}

	@Bean
	@ServiceActivator(inputChannel = "gcpPubsubOutputChannel")
	public MessageHandler messageSender(PubSubTemplate pubsubTemplate) {
		return new PubSubMessageHandler(pubsubTemplate, "gcp-pubsub-example");
	}

	@Autowired
	private GcpPubsubOutboundGateway messagingGateway;

	@PostMapping("/postMessage")
	public RedirectView postMessage(@RequestParam("message") String message) {
		this.messagingGateway.sendToGcpPubsub(message);
		return new RedirectView("/");
	}

}
Since this is a blog about GCP PubSub, I'll focus on explaining the code related to it. I won't be talking about the other annotations (e.g. @SpringBootApplication, @PostMapping, etc.). For example, @PostMapping is related to web and nothing to do with GCP PubSub. We just need that endpoint to trigger a send message to GCP PubSub. We can use other client libraries to communicate with GCP PubSub, not just Spring.
We use Spring Integration messaging gateway to write to a channel, gcpPubsubOutputChannel. This channel is still in Spring land. When a message is in this channel, it is then consumed by the MessageHandler (outbound channel adapter) which in turn publishes the message to GCP PubSub. The outbound channel adapter converts the Spring message into a GCP PubSub message and is published to the topic, gcp-pubsub-example. The @ServiceActivator annotation causes this MessageHandler to be applied to any new messages in inputChannel.
Lastly, we got a REST endpoint listening for messages which then forward the message to GCP PubSub. Short and sweet.
Spring Boot GCP PubSub Send in Action
Alrighty, run the Spring Boot app. We can do it command line (e.g. mvn spring-boot:run) or thru IntelliJ. I would suggest running it first on Google Cloud SDK Shell. If it works there then I don't see any reason why it won't work on IntelliJ. When the app is ready, hit the /postMessage endpoint.
$ curl --data "message=Eagle has landed!" localhost:8080/postMessage
Now, head over to GCP PubSub messages section and we should see the messages appear. If not, try reloading the web page or do a PULL. It should look like below.
Spring Boot GCP PubSub Send Wrap Up
Did you enjoy playing around the GCP PubSub service? We now have an idea on how to send messages via the GCP PubSub messaging service. Spring has made it easy for us by abstracting whatever it is happening under the hood. Thank you for reading.
In my previous blog, Spring Boot HttpOnly Cookie Example, I demonstrated how to use the HttpOnly flag to protect your cookie. Since an HttpOnly cookie cannot be managed on the front-end, here is a demonstration on how to manage it via the back-end. For this example we'll just expire the cookie when the user clicks a button. Shouldn't be tricky so let's get right to it.
Demonstration
Before we begin, these are the tools I used to make this example:
A couple of changes to the code. First, the endpoint to hit that then tells the browser to expire the cookie. Second, an update on the UI to trigger the cookie deletion.
LoginController.java
... code snipped ...
import org.springframework.web.bind.annotation.*;

@Controller
public class LoginController {

... code snipped ...

    @GetMapping("/clear-my-session")
    public @ResponseBody String clearMySession(HttpServletResponse response) {

        Cookie cookie = new Cookie("MY_SESSION", "deleted");
        cookie.setHttpOnly(true);
        cookie.setMaxAge(0);
        response.addCookie(cookie);

        return "";
    }
}
The /clear-my-session resource simply responds by setting the MaxAge of the cookie to zero for it to be deleted on the browser. In some other languages, in Go for example, you'll have to set the MaxAge to -1 to expire the cookie. So please read the API documentation if you're wondering why MaxAge zero doesn't work. Since we are just running on our local machhine, we don't provide the Path and Domain. When not running on your local machine, most likely you'll need to supply a Path (e.g. "/") and a Domain (e.g. example.com) to make things work.
Here, we added a button that hits the endpoint we created above. Simples.
Ready, Set, Go
Run the Spring Boot app. Go to the login page. Just type any username and password. You should have something like below. Open Web Tools and head over to the Storage tab (it could be called a different name on a different browser). Take note of the cookie named MY_SESSION.
As you already know from the previous blog, clicking on "JS Clear MY_SESSION" (JS for JavaScript) will not do anything. Now, try clicking on "BE Clear MY_SESSION", BE for back-end :). The MY_SESSION cookie disappears right before our eyes and you should have something like below. You can also check the network and console tabs to see what's happening behind the scenes.
Managing HttpOnly Cookie Wrap Up
There you have it. A nice way of managing your cookie from the back-end. Having the HttpOnly flag set prevents thrid parties from accessing your very important cookie. Now, it's only the back-end that can manipulate it. Thank you for reading.
Want to protect your cookie? Well, not from Santa Claus. I'm talking about HTTP Cookie. Using the HttpOnly flag when generating a cookie helps mitigate the risk of a client side script accessing the protected cookie. In other words, it won't be accessible programmatically on the client side (e.g. JavaScript). The cookie will be driven by the backend.
Why do this? To mitigate cross-site scripting (XSS) attacks. If a cross-site scripting flaw exists, and a user accidentally accesses a link that exploits this flaw, the browser will not reveal the cookie to a third party. Currently, every major browser supports HttpOnly cookies. If a browser does not support HttpOnly and a website attempts to set an HttpOnly cookie, the HttpOnly flag will be ignored by the browser, thus creating a traditional, script accessible cookie. As a result, the cookie (typically your session cookie) becomes vulnerable to theft or modification by a malicious script. Majority of XSS attacks target theft of session cookies. A server could help mitigate this issue by setting the HttpOnly flag on a cookie it creates, indicating the cookie should not be accessible on the client. If a browser that supports HttpOnly detects a cookie containing the HttpOnly flag, and client side script code attempts to read the cookie, the browser returns an empty string as the result. This causes the attack to fail by preventing the malicious (usually XSS) code from sending the data to an attacker’s website.
Demonstration
Before we begin, these are the tools I used to make this example:
IntelliJ IDEA 2023.3.4 (Community Edition)
openjdk-17.0.10
Spring Boot v3.4.1
Windows 11
The example code is here, github.com/jpllosa/httponly-cookie. Download it as you please. Now, on with the show. Run the Spring Boot app. Go to the login page, you should see something like below. Please forgive the look, this demo is about HttpOnly and not about the UI.
Without HttpOnly
Log in. Just type any user name and password. You should have something like below. Open Web Tools and head over to the Storage tab (it could be called a different name on a different browser). Take note of the HttpOnly column of the cookie named MY_SESSION.
This is the code of the Controller serving the page. Take note that we have commented out the line that sets the HttpOnly flag.
Now, click "Clear MY_SESSION" button. Notice that the cookie is gone as below.
With HttpOnly
Alright, this time, we'll put in the HttpOnly flag. Uncomment cookie.setHttpOnly(true); and restart the Spring Boot app. Log in again and as usual, have the Storage tab open. What happens when you click the "Clear MY_SESSION" button now? It's still there no matter how many times we click the button as shown on the console logs.
Spring Boot HttpOnly Cookie Conclusion
There you have it. A nice way of protecting your cookie. Having the HttpOnly flag set prevents thrid parties from accessing you very important cookie. It's now the task of the backend to manage the cookie. Thank you for reading.
How do you secure an already secure web application? Well, the title is that because we are going to build upon Spring's Securing a Web Application guide. You can follow the Spring guide to build your secure web app and then come back here to make it more secure. Or you can just keep on reading, I'm going to share the repo anyway.
Tools
Before we begin, these are the tools I used to make this example:
OpenSSL 3.0.2 15 Mar 2022 (Library: OpenSSL 3.0.2 15 Mar 2022)
Prerequisite
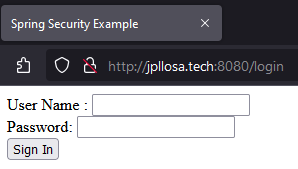
Alright. I'm assuming you followed the Spring guide to securing a web app and got it running. What you did was add Spring Security on your Spring Boot app which then protects your resource endpoints. You have secured it with a login page and only authorized users can access certain resources. You should have something like below.
I have added 127.0.0.1 jpllosa.tech on the Windows hosts (C:\Windows\System32\drivers\etc) file. We can't use localhost for our certificate later.
Requirement
And now the problem we are going to solve. Imagine this secure web app is runnning on our company network. As it stands anyone can see the website on the browser (e.g. by going to http://jpllosa.tech:8080). They would see the welcome and login pages. Now, we don't want just anybody to see the website. We only want, let's say level 1 clearance personnel and machine to see it. What do we do? Any ideas? Yes, we are going to serve the web app over HTTPS (Hypertext Transfer Protocol Secure) and then what's next? Yes, install our own certificate authority as a trusted certificate on the browser of the level 1 personnel's laptop (e.g. an IT services job). Is the requirement clear enough?
Create Self-signed Certificate
We're going to do PEM (Privacy Enhanced Mail) certificates. Thankfully, Spring Boot supports this. We don't have to deal with the Java specific JKS (Java KeyStore) format, which can be tricky to configure sometimes.
Let's start by creating a private key. This is the most important component of our certificate and helps to enable encryption. So open your WSL and generate a private key like so.
$ openssl genrsa -out jpllosa.tech.key 2048
$ ls
jpllosa.tech.key
Second, create a certificate signing request. A certificate signing request (CSR) includes the public key and some additional information like organization and country. We need this because we want our certificate signed. Create the CSR with our private key like below. I've left the challenge password and optional company name blank. The important field is Common Name, which should be the fully qualified domain name (FQDN) of our domain.
$ openssl req -key jpllosa.tech.key -new -out jpllosa.tech.csr
You are about to be asked to enter information that will be incorporated
into your certificate request.
What you are about to enter is what is called a Distinguished Name or a DN.
There are quite a few fields but you can leave some blank
For some fields there will be a default value,
If you enter '.', the field will be left blank.
-----
Country Name (2 letter code) [AU]:AU
State or Province Name (full name) [Some-State]:Some-State
Locality Name (eg, city) []:City
Organization Name (eg, company) [Internet Widgits Pty Ltd]:Internet Widgets
Organizational Unit Name (eg, section) []:section
Common Name (e.g. server FQDN or YOUR name) []:jpllosa.tech
Email Address []:webmaster@jpllosa.tech

Please enter the following 'extra' attributes
to be sent with your certificate request
A challenge password []:
An optional company name []:
$ ls
jpllosa.tech.csr  jpllosa.tech.key
Next, we create a self-signed certificate with our private key and CSR. This is a certificate signed with its own private key. This certificate isn't trusted since it is self-signed. Create a self-signed certificate like so.
$ openssl x509 -signkey jpllosa.tech.key -in jpllosa.tech.csr -req -days 365 -out jpllosa.tech.crt
Certificate request self-signature ok
subject=C = AU, ST = Some-State, L = City, O = Internet Widgets, OU = section, CN = jpllosa.tech, emailAddress = webmaster@jpllosa.tech
$ ls
jpllosa.tech.crt  jpllosa.tech.csr  jpllosa.tech.key
Now we need something for the browser (i.e. client side) as we will need to install a trusted certificate for it. We need a self-signed root certificate authority (CA) certificate. We can do this by being our own certificate authority. Let's create a self-signed root CA like so.
$ openssl req -x509 -sha256 -days 1825 -newkey rsa:2048 -keyout myCA.key -out myCA.crt
.....+...+...+++++++++++++++++++++++++++++++++++++++++++++++++++++++++++++++++*.+....+........+...+...+.+++++++++++++++++++++++++++++++++++++++++++++++++++++++++++++++++*....+..+.............+.................+..........+..+............+.+........+.+..............+....+..+......+.......+..+.............+..+.........+............+....+..............+......+...+...............+...+....+...........+..........+..............+....+...............+..+....+..............+......+.+...+.........+.....+...+.........+....+...........+...+.+.........+..+......+...+....+.....+.+...........+...................+..+...+++++++++++++++++++++++++++++++++++++++++++++++++++++++++++++++++
.................+..........+.....+.......+...+...+..+..........+++++++++++++++++++++++++++++++++++++++++++++++++++++++++++++++++*..+..+.............+..+.+...+..+.......+..+...+.+...........+....+.....+.........+.+.....+.......+..+.......+......+..+.+.....+....+.....+...+.......+..+....+.....+.......+.....+....+........+......+....+.....+...+.......+......+.....+.......+++++++++++++++++++++++++++++++++++++++++++++++++++++++++++++++++*.+...+...+......+...........+.......+...+..+...+.......+..+....+..+.......+........+++++++++++++++++++++++++++++++++++++++++++++++++++++++++++++++++
Enter PEM pass phrase: password
Verifying - Enter PEM pass phrase: password
-----
You are about to be asked to enter information that will be incorporated
into your certificate request.
What you are about to enter is what is called a Distinguished Name or a DN.
There are quite a few fields but you can leave some blank
For some fields there will be a default value,
If you enter '.', the field will be left blank.
-----
Country Name (2 letter code) [AU]:AU
State or Province Name (full name) [Some-State]:Some-State
Locality Name (eg, city) []:City
Organization Name (eg, company) [Internet Widgits Pty Ltd]:Internet Widgets
Organizational Unit Name (eg, section) []:Section
Common Name (e.g. server FQDN or YOUR name) []:my.com
Email Address []:webmaster@my.com
$ ls
jpllosa.tech.crt  jpllosa.tech.csr  jpllosa.tech.key  myCA.crt  myCA.key
Next, we sign our CSR with our root CA. The result will be, the CA-signed certificate will be in the jpllosa.tech.crt file. This is a working certificate. Create like so.
$ openssl x509 -req -CA myCA.crt -CAkey myCA.key -in jpllosa.tech.csr -out jpllosa.tech.crt -days 365 -CAcreateserial
Certificate request self-signature ok
subject=C = AU, ST = Some-State, L = City, O = Internet Widgets, OU = section, CN = jpllosa.tech, emailAddress = webmaster@jpllosa.tech
Enter pass phrase for myCA.key: password
$ ls
jpllosa.tech.crt  jpllosa.tech.csr  jpllosa.tech.key  myCA.crt  myCA.key
Even though we have created a working certificate, it will still be flagged by the browser. What we need is to add the subjectAltName. We need a SAN extension. X.509 certificates need information about the domain for which this particular certificate is issued for. To align with SAN extension stadards, we need to create a configuration text file then add the configuration to the certificate. Like so. How's your vi skills?
$ vi jpllosa.tech.ext
$ cat jpllosa.tech.ext
authorityKeyIdentifier=keyid,issuer
basicConstraints=CA:false
subjectAltName = @alt_names
[alt_names]
DNS.1 = jpllosa.tech
$ openssl x509 -req -CA myCA.crt -CAkey myCA.key -in jpllosa.tech.csr -out jpllosa.tech.crt -days 365 -CAcreateserial -extfile jpllosa.tech.ext
Certificate request self-signature ok
subject=C = AU, ST = Some-State, L = City, O = Internet Widgets, OU = section, CN = jpllosa.tech, emailAddress = webmaster@jpllosa.tech
Enter pass phrase for myCA.key: password
$ ls
jpllosa.tech.crt  jpllosa.tech.csr  jpllosa.tech.ext  jpllosa.tech.key  myCA.crt  myCA.key
Finally, we got a working certificate that meets all the SAN requirements. SAN makes the certificates more secure and it allows the definition of several domains or IP addresses and we can use a single certificate across multiple domains. View the certificate like so. Spot the important bit, Subject Alternative Name.
$ openssl x509 -text -noout -in jpllosa.tech.crt
Certificate:
    Data:
        Version: 3 (0x2)
        Serial Number:
            78:db:cd:5a:18:8d:46:0f:74:55:16:86:dc:f2:74:95:1b:c4:58:0e
        Signature Algorithm: sha256WithRSAEncryption
        Issuer: C = AU, ST = Some-State, L = City, O = Internet Widgets, OU = Section, CN = my.com, emailAddress = webmaster@my.com
        Validity
            Not Before: Oct  5 16:41:02 2024 GMT
            Not After : Oct  5 16:41:02 2025 GMT
        Subject: C = AU, ST = Some-State, L = City, O = Internet Widgets, OU = section, CN = jpllosa.tech, emailAddress = webmaster@jpllosa.tech
        Subject Public Key Info:
            Public Key Algorithm: rsaEncryption
                Public-Key: (2048 bit)
                Modulus:
                    00:ac:70:3c:57:da:fc:f4:b4:f6:4f:f4:3d:64:9f:
                    27:ca:09:d9:b6:4e:4d:89:2f:db:4b:6e:7c:18:4b:
                    af:5c:b4:80:cc:42:0a:cd:1e:15:1e:2d:be:71:e4:
                    6c:59:40:82:c5:ac:29:3b:fa:51:0b:6b:20:11:e5:
                    7d:1e:92:f7:e9:9d:f4:15:31:47:64:ec:1b:a5:14:
                    00:6e:c0:98:76:be:71:9d:c6:97:14:47:aa:30:b1:
                    ef:c4:b4:6b:b0:31:22:25:65:21:ab:35:21:ac:7b:
                    6a:f7:c0:78:d2:90:7d:33:d0:3c:dc:db:21:8e:75:
                    ff:04:83:bd:e6:9a:5d:79:70:a2:59:21:ff:51:20:
                    ea:74:d1:78:89:61:49:f6:6c:87:85:e2:0f:0c:f7:
                    b4:be:2b:79:88:28:fc:f7:50:ef:c1:e6:63:3e:a4:
                    0e:3c:71:18:97:55:5c:76:18:80:67:af:84:0a:16:
                    98:79:aa:00:00:77:a4:1b:97:bd:9c:41:50:13:89:
                    0c:63:29:51:84:7f:95:67:b7:f0:94:2b:b4:bb:50:
                    5e:6f:66:d1:06:4a:97:d6:3a:ac:6e:90:59:22:2c:
                    d3:09:a1:4b:e7:a1:3c:96:f6:b5:9c:25:5f:5b:cb:
                    be:a5:41:11:da:dc:a5:1b:cd:86:4d:a1:bd:44:1c:
                    44:c5
                Exponent: 65537 (0x10001)
        X509v3 extensions:
            X509v3 Authority Key Identifier:
                17:B0:3C:87:D6:06:3C:54:21:F9:0B:8D:94:46:EF:F9:FA:A9:5C:8C
            X509v3 Basic Constraints:
                CA:FALSE
            X509v3 Subject Alternative Name:
                DNS:jpllosa.tech
            X509v3 Subject Key Identifier:
                93:B7:A9:CB:E3:56:A7:38:C1:8A:E6:6E:0A:0B:4B:4C:FE:1A:B7:FA
    Signature Algorithm: sha256With
...snipped...
Configure Spring Boot with PEM Certificates for TLS/SSL Communication
And now the easy part. Thanks to Spring Boot. All we have to do is add some properties on the application.properties file to enable SSL communication. Update the properties file like so.
Place jpllosa.tech.crt and jpllosa.tech.key under /src/main/resources so it can be picked up in the classpath. Try running the web app and go to the site. What do you see? Do you see something like below?
Our HTTPS site is still getting a warning. You could advance and accept the risk but what we want is for the browser to trust the site.
Browser Configuration
We need to import the root CA into the browser so our site can be trusted. These steps are specific to Firefox. Go to Settings > Privacy & Security > View Certificates.
Import myCA.crt and trust it to identify websites. You should be able to see Internet Widgets installed.
Let's try accessing the web app again. What does it say now? The warning is gone and you can go to the welcome and login pages.
Securing a Secure Web Application Summary
What a journey. To secure a Spring Boot app with PEM certificates for SSL communication was the easy bit. Just a few lines in the properties file. The arduous bit was the creation of the PEM certificates. Lastly we had to import our root CA to the browser so our site can be trusted. There you have it. We got to secure a secured web app. Was the requirement satisfied? . As usual, entire code is available at github.com/jpllosa/cert-web-app. Thank you for reading.