How do you secure an already secure web application? Well, the title is that because we are going to build upon Spring's Securing a Web Application guide. You can follow the Spring guide to build your secure web app and then come back here to make it more secure. Or you can just keep on reading, I'm going to share the repo anyway.
Tools
Before we begin, these are the tools I used to make this example:
- IntelliJ IDEA 2023.3.4 (Community Edition)
- openjdk-17.0.10
- Spring Boot v3.3.3
- Windows 11
- Ubuntu 22.04.3 LTS (GNU/Linux 5.15.153.1-microsoft-standard-WSL2)
- OpenSSL 3.0.2 15 Mar 2022 (Library: OpenSSL 3.0.2 15 Mar 2022)
Prerequisite
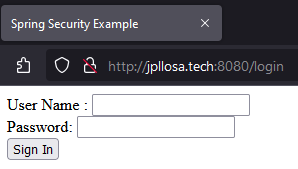
Alright. I'm assuming you followed the Spring guide to securing a web app and got it running. What you did was add Spring Security on your Spring Boot app which then protects your resource endpoints. You have secured it with a login page and only authorized users can access certain resources. You should have something like below.

I have added 127.0.0.1 jpllosa.tech on the Windows hosts (C:\Windows\System32\drivers\etc) file. We can't use localhost for our certificate later.
Requirement
And now the problem we are going to solve. Imagine this secure web app is runnning on our company network. As it stands anyone can see the website on the browser (e.g. by going to http://jpllosa.tech:8080). They would see the welcome and login pages. Now, we don't want just anybody to see the website. We only want, let's say level 1 clearance personnel and machine to see it. What do we do? Any ideas? Yes, we are going to serve the web app over HTTPS (Hypertext Transfer Protocol Secure) and then what's next? Yes, install our own certificate authority as a trusted certificate on the browser of the level 1 personnel's laptop (e.g. an IT services job). Is the requirement clear enough?
Create Self-signed Certificate
We're going to do PEM (Privacy Enhanced Mail) certificates. Thankfully, Spring Boot supports this. We don't have to deal with the Java specific JKS (Java KeyStore) format, which can be tricky to configure sometimes.
Let's start by creating a private key. This is the most important component of our certificate and helps to enable encryption. So open your WSL and generate a private key like so.
$ openssl genrsa -out jpllosa.tech.key 2048
$ ls
jpllosa.tech.key
Second, create a certificate signing request. A certificate signing request (CSR) includes the public key and some additional information like organization and country. We need this because we want our certificate signed. Create the CSR with our private key like below. I've left the challenge password and optional company name blank. The important field is Common Name, which should be the fully qualified domain name (FQDN) of our domain.
$ openssl req -key jpllosa.tech.key -new -out jpllosa.tech.csr
You are about to be asked to enter information that will be incorporated
into your certificate request.
What you are about to enter is what is called a Distinguished Name or a DN.
There are quite a few fields but you can leave some blank
For some fields there will be a default value,
If you enter '.', the field will be left blank.
-----
Country Name (2 letter code) [AU]:AU
State or Province Name (full name) [Some-State]:Some-State
Locality Name (eg, city) []:City
Organization Name (eg, company) [Internet Widgits Pty Ltd]:Internet Widgets
Organizational Unit Name (eg, section) []:section
Common Name (e.g. server FQDN or YOUR name) []:jpllosa.tech
Email Address []:webmaster@jpllosa.tech

Please enter the following 'extra' attributes
to be sent with your certificate request
A challenge password []:
An optional company name []:
$ ls
jpllosa.tech.csr  jpllosa.tech.key
Next, we create a self-signed certificate with our private key and CSR. This is a certificate signed with its own private key. This certificate isn't trusted since it is self-signed. Create a self-signed certificate like so.
$ openssl x509 -signkey jpllosa.tech.key -in jpllosa.tech.csr -req -days 365 -out jpllosa.tech.crt
Certificate request self-signature ok
subject=C = AU, ST = Some-State, L = City, O = Internet Widgets, OU = section, CN = jpllosa.tech, emailAddress = webmaster@jpllosa.tech
$ ls
jpllosa.tech.crt  jpllosa.tech.csr  jpllosa.tech.key
Now we need something for the browser (i.e. client side) as we will need to install a trusted certificate for it. We need a self-signed root certificate authority (CA) certificate. We can do this by being our own certificate authority. Let's create a self-signed root CA like so.
$ openssl req -x509 -sha256 -days 1825 -newkey rsa:2048 -keyout myCA.key -out myCA.crt
.....+...+...+++++++++++++++++++++++++++++++++++++++++++++++++++++++++++++++++*.+....+........+...+...+.+++++++++++++++++++++++++++++++++++++++++++++++++++++++++++++++++*....+..+.............+.................+..........+..+............+.+........+.+..............+....+..+......+.......+..+.............+..+.........+............+....+..............+......+...+...............+...+....+...........+..........+..............+....+...............+..+....+..............+......+.+...+.........+.....+...+.........+....+...........+...+.+.........+..+......+...+....+.....+.+...........+...................+..+...+++++++++++++++++++++++++++++++++++++++++++++++++++++++++++++++++
.................+..........+.....+.......+...+...+..+..........+++++++++++++++++++++++++++++++++++++++++++++++++++++++++++++++++*..+..+.............+..+.+...+..+.......+..+...+.+...........+....+.....+.........+.+.....+.......+..+.......+......+..+.+.....+....+.....+...+.......+..+....+.....+.......+.....+....+........+......+....+.....+...+.......+......+.....+.......+++++++++++++++++++++++++++++++++++++++++++++++++++++++++++++++++*.+...+...+......+...........+.......+...+..+...+.......+..+....+..+.......+........+++++++++++++++++++++++++++++++++++++++++++++++++++++++++++++++++
Enter PEM pass phrase: password
Verifying - Enter PEM pass phrase: password
-----
You are about to be asked to enter information that will be incorporated
into your certificate request.
What you are about to enter is what is called a Distinguished Name or a DN.
There are quite a few fields but you can leave some blank
For some fields there will be a default value,
If you enter '.', the field will be left blank.
-----
Country Name (2 letter code) [AU]:AU
State or Province Name (full name) [Some-State]:Some-State
Locality Name (eg, city) []:City
Organization Name (eg, company) [Internet Widgits Pty Ltd]:Internet Widgets
Organizational Unit Name (eg, section) []:Section
Common Name (e.g. server FQDN or YOUR name) []:my.com
Email Address []:webmaster@my.com
$ ls
jpllosa.tech.crt  jpllosa.tech.csr  jpllosa.tech.key  myCA.crt  myCA.key
Next, we sign our CSR with our root CA. The result will be, the CA-signed certificate will be in the jpllosa.tech.crt file. This is a working certificate. Create like so.
$ openssl x509 -req -CA myCA.crt -CAkey myCA.key -in jpllosa.tech.csr -out jpllosa.tech.crt -days 365 -CAcreateserial
Certificate request self-signature ok
subject=C = AU, ST = Some-State, L = City, O = Internet Widgets, OU = section, CN = jpllosa.tech, emailAddress = webmaster@jpllosa.tech
Enter pass phrase for myCA.key: password
$ ls
jpllosa.tech.crt  jpllosa.tech.csr  jpllosa.tech.key  myCA.crt  myCA.key
Even though we have created a working certificate, it will still be flagged by the browser. What we need is to add the subjectAltName. We need a SAN extension. X.509 certificates need information about the domain for which this particular certificate is issued for. To align with SAN extension stadards, we need to create a configuration text file then add the configuration to the certificate. Like so. How's your vi skills?
$ vi jpllosa.tech.ext
$ cat jpllosa.tech.ext
authorityKeyIdentifier=keyid,issuer
basicConstraints=CA:false
subjectAltName = @alt_names
[alt_names]
DNS.1 = jpllosa.tech
$ openssl x509 -req -CA myCA.crt -CAkey myCA.key -in jpllosa.tech.csr -out jpllosa.tech.crt -days 365 -CAcreateserial -extfile jpllosa.tech.ext
Certificate request self-signature ok
subject=C = AU, ST = Some-State, L = City, O = Internet Widgets, OU = section, CN = jpllosa.tech, emailAddress = webmaster@jpllosa.tech
Enter pass phrase for myCA.key: password
$ ls
jpllosa.tech.crt  jpllosa.tech.csr  jpllosa.tech.ext  jpllosa.tech.key  myCA.crt  myCA.key
Finally, we got a working certificate that meets all the SAN requirements. SAN makes the certificates more secure and it allows the definition of several domains or IP addresses and we can use a single certificate across multiple domains. View the certificate like so. Spot the important bit, Subject Alternative Name.
$ openssl x509 -text -noout -in jpllosa.tech.crt
Certificate:
    Data:
        Version: 3 (0x2)
        Serial Number:
            78:db:cd:5a:18:8d:46:0f:74:55:16:86:dc:f2:74:95:1b:c4:58:0e
        Signature Algorithm: sha256WithRSAEncryption
        Issuer: C = AU, ST = Some-State, L = City, O = Internet Widgets, OU = Section, CN = my.com, emailAddress = webmaster@my.com
        Validity
            Not Before: Oct  5 16:41:02 2024 GMT
            Not After : Oct  5 16:41:02 2025 GMT
        Subject: C = AU, ST = Some-State, L = City, O = Internet Widgets, OU = section, CN = jpllosa.tech, emailAddress = webmaster@jpllosa.tech
        Subject Public Key Info:
            Public Key Algorithm: rsaEncryption
                Public-Key: (2048 bit)
                Modulus:
                    00:ac:70:3c:57:da:fc:f4:b4:f6:4f:f4:3d:64:9f:
                    27:ca:09:d9:b6:4e:4d:89:2f:db:4b:6e:7c:18:4b:
                    af:5c:b4:80:cc:42:0a:cd:1e:15:1e:2d:be:71:e4:
                    6c:59:40:82:c5:ac:29:3b:fa:51:0b:6b:20:11:e5:
                    7d:1e:92:f7:e9:9d:f4:15:31:47:64:ec:1b:a5:14:
                    00:6e:c0:98:76:be:71:9d:c6:97:14:47:aa:30:b1:
                    ef:c4:b4:6b:b0:31:22:25:65:21:ab:35:21:ac:7b:
                    6a:f7:c0:78:d2:90:7d:33:d0:3c:dc:db:21:8e:75:
                    ff:04:83:bd:e6:9a:5d:79:70:a2:59:21:ff:51:20:
                    ea:74:d1:78:89:61:49:f6:6c:87:85:e2:0f:0c:f7:
                    b4:be:2b:79:88:28:fc:f7:50:ef:c1:e6:63:3e:a4:
                    0e:3c:71:18:97:55:5c:76:18:80:67:af:84:0a:16:
                    98:79:aa:00:00:77:a4:1b:97:bd:9c:41:50:13:89:
                    0c:63:29:51:84:7f:95:67:b7:f0:94:2b:b4:bb:50:
                    5e:6f:66:d1:06:4a:97:d6:3a:ac:6e:90:59:22:2c:
                    d3:09:a1:4b:e7:a1:3c:96:f6:b5:9c:25:5f:5b:cb:
                    be:a5:41:11:da:dc:a5:1b:cd:86:4d:a1:bd:44:1c:
                    44:c5
                Exponent: 65537 (0x10001)
        X509v3 extensions:
            X509v3 Authority Key Identifier:
                17:B0:3C:87:D6:06:3C:54:21:F9:0B:8D:94:46:EF:F9:FA:A9:5C:8C
            X509v3 Basic Constraints:
                CA:FALSE
            X509v3 Subject Alternative Name:
                DNS:jpllosa.tech
            X509v3 Subject Key Identifier:
                93:B7:A9:CB:E3:56:A7:38:C1:8A:E6:6E:0A:0B:4B:4C:FE:1A:B7:FA
    Signature Algorithm: sha256With
...snipped...
Configure Spring Boot with PEM Certificates for TLS/SSL Communication
And now the easy part. Thanks to Spring Boot. All we have to do is add some properties on the application.properties file to enable SSL communication. Update the properties file like so.
server.port=8443
server.ssl.certificate=classpath:jpllosa.tech.crt
server.ssl.certificate-private-key=classpath:jpllosa.tech.key
Place jpllosa.tech.crt and jpllosa.tech.key under /src/main/resources so it can be picked up in the classpath. Try running the web app and go to the site. What do you see? Do you see something like below?

Our HTTPS site is still getting a warning. You could advance and accept the risk but what we want is for the browser to trust the site.
Browser Configuration
We need to import the root CA into the browser so our site can be trusted. These steps are specific to Firefox. Go to Settings > Privacy & Security > View Certificates.

Import myCA.crt and trust it to identify websites. You should be able to see Internet Widgets installed.

Let's try accessing the web app again. What does it say now? The warning is gone and you can go to the welcome and login pages.


Securing a Secure Web Application Summary
What a journey. To secure a Spring Boot app with PEM certificates for SSL communication was the easy bit. Just a few lines in the properties file. The arduous bit was the creation of the PEM certificates. Lastly we had to import our root CA to the browser so our site can be trusted. There you have it. We got to secure a secured web app. Was the requirement satisfied? . As usual, entire code is available at github.com/jpllosa/cert-web-app. Thank you for reading.


