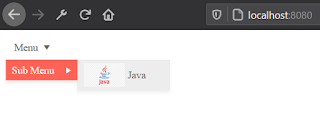
This article is an example of the Kendo Menu Component with a Spring Boot backend. The framework used is the Kendo UI for jQuery. In this example, let us imagine that we need to build a menu with an icon. Sound simple? Let's make it a bit harder. The menu and icon are dynamic. In this example we'll just hardcode the menu data source but in the real world, the data for the menu is provided by a web API. So consider that our menu can have more or less menu items or sub menu items depending on the logged in user. An additional complexity is that our menu items have dynamic icons which we need to pull from the web API. This is the focus of this example, dynamic icons for the menu items.
The IDE used is Spring Tool Suite 4 and it is expected that the reader know a thing or two about Spring Boot. Make sure you are connected to the Internet because the code pulls the Kendo library from the Telerik CDN. Take note that this is just a demonstration code and you'll need to purchase a license if you are going to
use Kendo UI for jQuery for more than just evaluation purposes.
So here we go. One solution could be to pull all the icons when we get the menu data. Possible but might take longer to build the menu. And as we all know users hate to wait. So we only fetch the icon when the menu item is about to be shown and not invoke the web API call again if we already have the icon.
This is our icon web API endpoint.
package com.blogspot.jpllosa.controller;

import java.io.IOException;
import java.io.InputStream;

import org.apache.commons.io.IOUtils;
import org.springframework.http.MediaType;
import org.springframework.stereotype.Controller;
import org.springframework.web.bind.annotation.GetMapping;
import org.springframework.web.bind.annotation.ResponseBody;

@Controller
public class ImageController {

    @GetMapping(
        value = "/get-image",
        produces = MediaType.IMAGE_JPEG_VALUE)
    public @ResponseBody byte[] getImage() throws IOException {
        InputStream in = getClass().getResourceAsStream("/java.png");
        return IOUtils.toByteArray(in);
    }
}
Here is our frontend code.
<!DOCTYPE html>
<html xmlns:th="https://www.thymeleaf.org">
<head>
    <meta charset="UTF-8">
    <title>Kendo Menu with Spring Boot</title>
    <link rel="stylesheet" href="https://kendo.cdn.telerik.com/2021.1.119/styles/kendo.default-v2.min.css"/>

    <script src="http://code.jquery.com/jquery-3.5.1.min.js"></script>
    <script src="https://kendo.cdn.telerik.com/2021.1.119/js/kendo.all.min.js"></script>

<style>
img.k-image {
    height: 2rem;
}
</style>

</head>
<body>
    <ul id="menu"></ul>

<script>
$(document).ready(function() {
    $("#menu").kendoMenu({
        animation: false,
        dataSource: {
            data: [{
                text: "Menu",
                items: [{
                    text: "Sub Menu",
                    items: [{
                        text: "Java",
                        imageUrl: "#",
                    }],
                }],
            }],
        },
        open: function(e) {
            var $img = $(e.item).find("span img.k-image")
            var src = $img.attr("src");

            if (src) {
                if (src === "#") {
                    $.ajax({
                        type: "GET",
                        url: "/get-image",
                        xhrFields: {
                            responseType: "blob",
                        },
                        cache: false,
                    })
                    .done(function(data, textStatus, jqXhr) {
                        var imageUrl = URL.createObjectURL(data);
                        $img.attr("src", imageUrl);
                    });
                }
            }
        },
    });
});
</script>
</body>
</html>
The output looks like this:
 |
| Kendo Menu with Spring Boot |
There you have it. I hope you found this example educational. The complete project can be cloned from github.com/jpllosa/spring-boot-kendo-menu